Control Center
Question:
How to set up SQL Server for Control Center V4.X?
Answer:
Please follow the instructions below.
1. Open SQL Server Configuration Manager, click SQL Server Network Configuration > Protocols for your SQL Server, then double click TCP/IP.

2. Change the “Enable” option to Yes.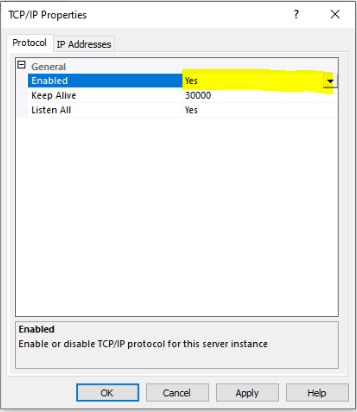
3. Click the “IP Address” tab, scroll down to the bottom.
Under the “IPAII” section, enter [b[“1433”[/b] for TCP Port, then click OK.

4. Cick SQL Server Service, right click “SQL Server (Your SQL Server)” and click Restart.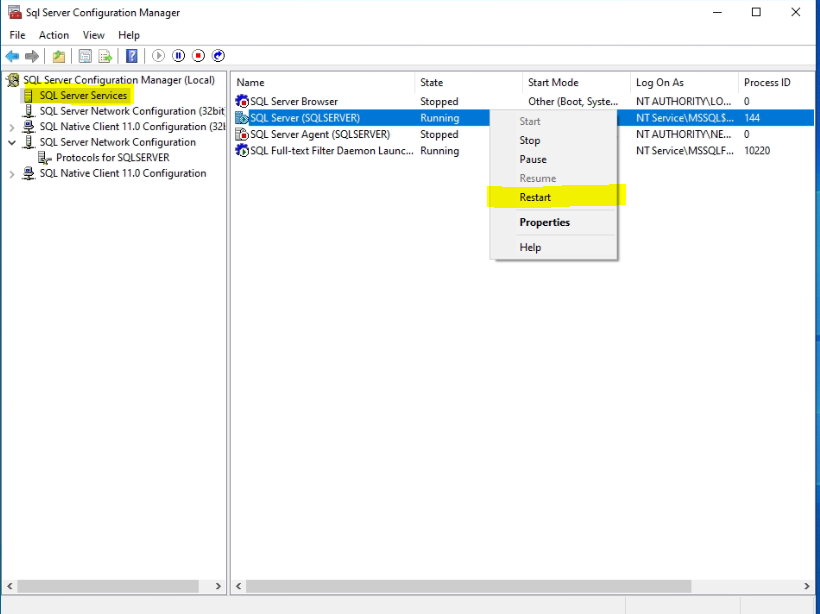
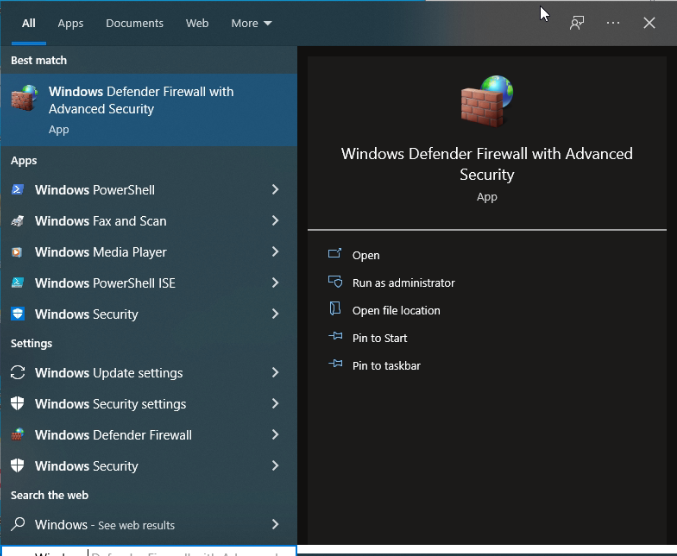
5. Open Windows Defender Firewall with Advanced Security.
6. Click Inbound Rules > New Rule….

7. Select Port and click Next.

8. Choose TCP, then choose Specific local ports, enter "1433” and click Next.

9. Choose Allow the connection and click Next.
10. Enable all three options and click Next.
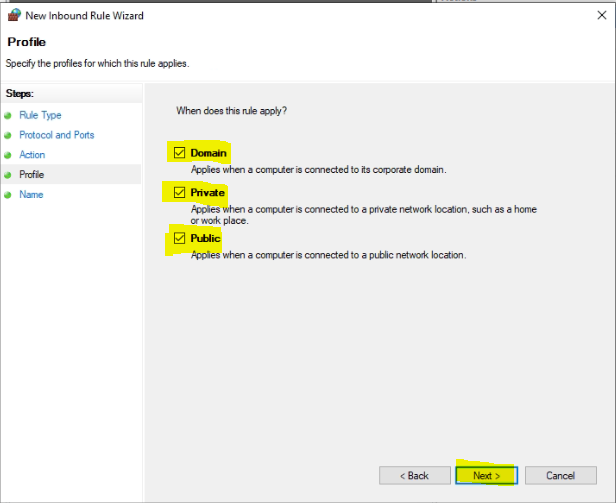
11. Enter a preferred name for the rule and click Finish.

12. Open Microsoft SQL Server Management Studio and login.
Under your SQL server, right click Databases and click New Database.

13. Enter a preferred name for the database and click OK.


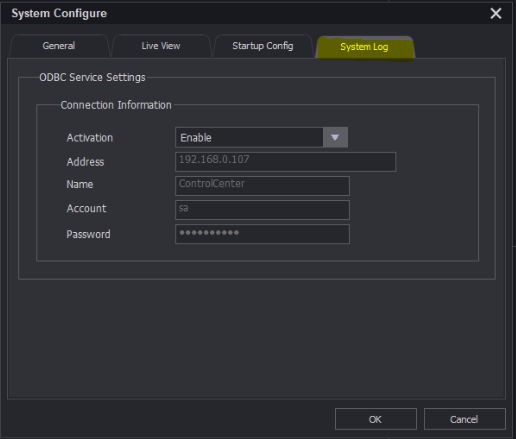
14. Open Control Center, click Configure > Setup > System Configure.

15. Click the “System Log “ tab.
- Address: Enter the IP address of your SQL Server.
- Name: Enter the database name.
- Account / Password: Enter your SQL Server credentials.
- Choose Enable for Activation and click OK.