
GeoVision Webcam Setup Guide (pt. 2)
Assigning a Static LAN IP address to your GeoVision system
When you connect your PC to your router, it will obtain an LAN IP address. The address your router assigns to your PC may not always be the same. It is important that your GeoVision PC has a static LAN IP address, as we will be setting up port forwarding.
To find out the IP address of your GeoVision PC
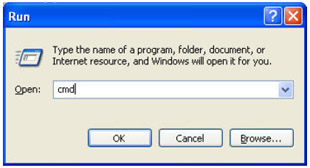
1. START > Run
2. Type cmd <enter>
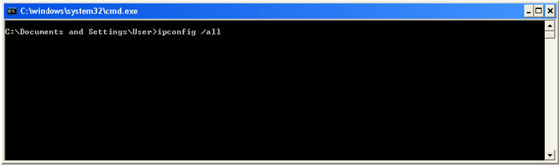
3. Type ipconfig /all <enter>
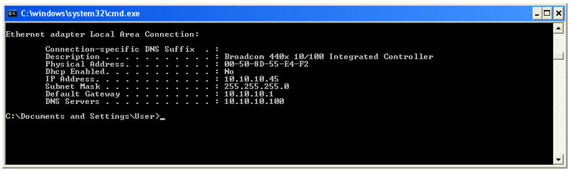
4. Make a note of your:
5. Type exit <enter>
Setting your LAN IP address to a static address
1. START > Settings > Control Panel
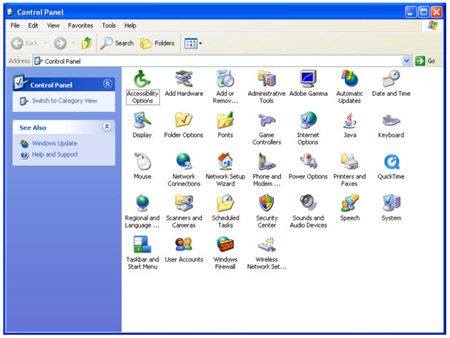
2. Double Click on Network Connections

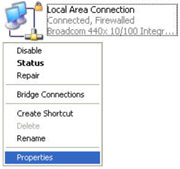
3. Right Click on the Local Area Connection and Click on Properties
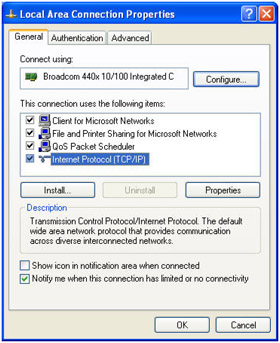
4. Double Click on Internet Protocol (TCP/IP)
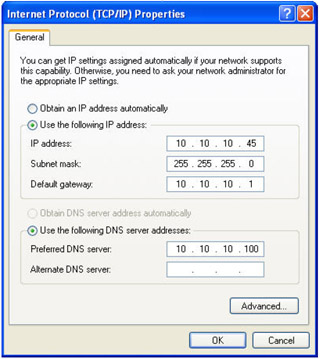
5. You will see on this screen that there is a dot next to Obtain IP address automatically. If your setup has a dot next to Use the following IP address then you are already setup or a static IP address, and you do not need to follow the instructions below.
6. Click on Use the following IP address
7. Enter the details that you wrote down earlier, filling in all fields
8. Click OK on all open screens to exit this setup menu.
N.B.
Now is a good time to test your Internet connection, this can be done easily by opening Internet Explorer and browsing for a webpage. If your test fails, please recheck all entries in the screen above.
Examples of router configuration
All routers are different, in this section we will go through the setup of 3 common routers. If your router is not listed, then a very good resource is www.portforward.com.
They have detailed guides for the GeoVision setup for most routers, you can go to:
http://www.portforward.com/english/applications/port_forwarding/GeoCam/GeoCamindex.htm
These guides include the ports 21 and 3389, these are optional and are not necessary for GeoVision WebCam
All of the following setups will assume that the following IP addresses, you will need to use your own IP address found in the section above.
IP Addresses
Router
IP address 192.168.1.1
GeoVision System
IP address 192.168.1.2
Open Internet Explorer
Enter the router IP address 192.168.1.1 (Router IP) in the Address Bar
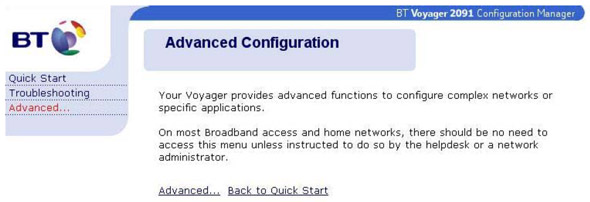
Click on Advanced
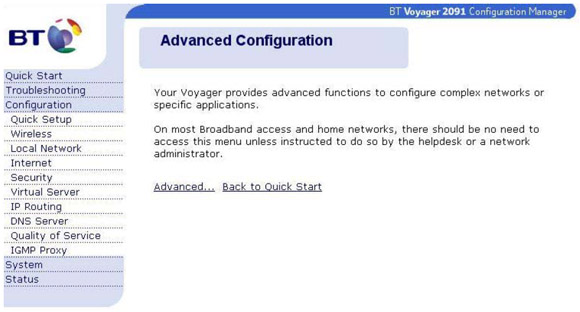
Click on Virtual Server under Configuration
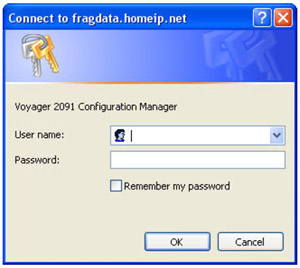
Enter the User name and Password
Default User name admin default Password admin
Click on OK
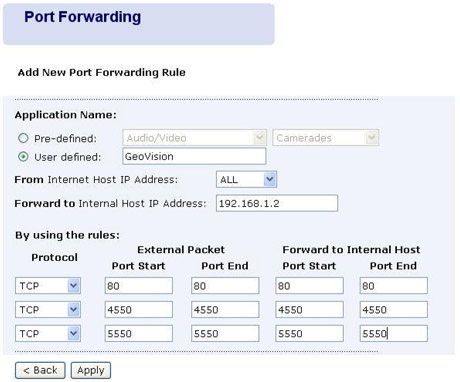
Click on Port Forwarding on the top banner

Click on Add near the right side of the page
Click on the radial next to “User Defined”
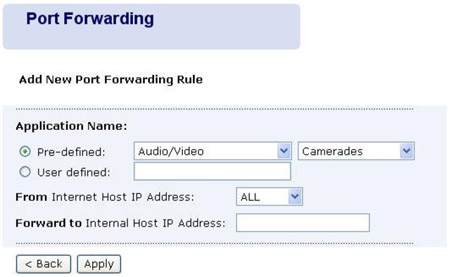
Name the service “GeoVision”
Enter the IP address to forward to (GeoVision system) 192.168.1.2
Enter the port numbers as below
Click on Apply
When you connect your PC to your router, it will obtain an LAN IP address. The address your router assigns to your PC may not always be the same. It is important that your GeoVision PC has a static LAN IP address, as we will be setting up port forwarding.
To find out the IP address of your GeoVision PC
1. START > Run
2. Type cmd <enter>
3. Type ipconfig /all <enter>
4. Make a note of your:
- IP Address
- Subnet mask
- Default Gateway
- DNS Servers
5. Type exit <enter>
Setting your LAN IP address to a static address
1. START > Settings > Control Panel
2. Double Click on Network Connections
3. Right Click on the Local Area Connection and Click on Properties
4. Double Click on Internet Protocol (TCP/IP)
5. You will see on this screen that there is a dot next to Obtain IP address automatically. If your setup has a dot next to Use the following IP address then you are already setup or a static IP address, and you do not need to follow the instructions below.
6. Click on Use the following IP address
7. Enter the details that you wrote down earlier, filling in all fields
8. Click OK on all open screens to exit this setup menu.
N.B.
Now is a good time to test your Internet connection, this can be done easily by opening Internet Explorer and browsing for a webpage. If your test fails, please recheck all entries in the screen above.
Examples
Examples of router configuration
All routers are different, in this section we will go through the setup of 3 common routers. If your router is not listed, then a very good resource is www.portforward.com.
They have detailed guides for the GeoVision setup for most routers, you can go to:
http://www.portforward.com/english/applications/port_forwarding/GeoCam/GeoCamindex.htm
These guides include the ports 21 and 3389, these are optional and are not necessary for GeoVision WebCam
All of the following setups will assume that the following IP addresses, you will need to use your own IP address found in the section above.
IP Addresses
Router
IP address 192.168.1.1
GeoVision System
IP address 192.168.1.2
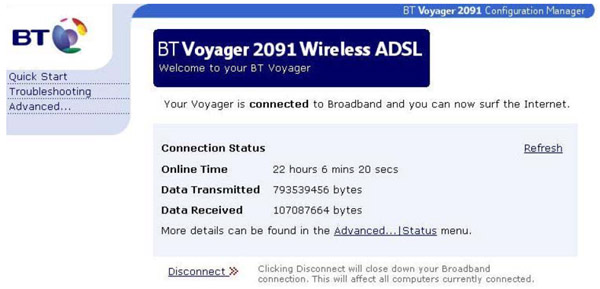
| Example 1 BT Voyager 220V / 2091 |  |
Open Internet Explorer
Enter the router IP address 192.168.1.1 (Router IP) in the Address Bar
Click on Advanced
Click on Virtual Server under Configuration
Enter the User name and Password
Default User name admin default Password admin
Click on OK
Click on Port Forwarding on the top banner
Click on Add near the right side of the page
Click on the radial next to “User Defined”
Name the service “GeoVision”
Enter the IP address to forward to (GeoVision system) 192.168.1.2
Enter the port numbers as below
Click on Apply
| < Previous page | Next page > |

