
How to add EVS to DSS
EVS/How To Add To DSS
How to add EVS to DSS
Description
This article is to show user how to add EVS to DSS unit as an extended storage. In this tutorial, we are using DSS Pro UI.
Prerequisites
- EVS with or without RAID setup.
- DSS Hardware or Software
Step by Step Instruction
1. Locate EVS System Manager from web browser.

2. Click on IPSAN and choose Storage Pool. Click Add to create new Storage Pool.

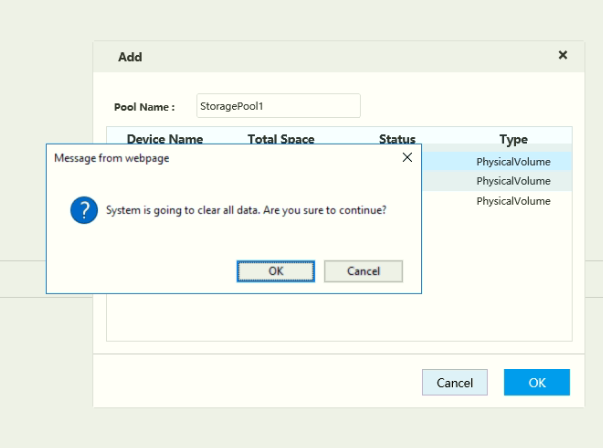
3. Enter the Pool Name and select your RAID Array or individual disk that are available. Then, click OK.

4. The system will prompt you that all data in the HDD will be formatted, click OK to continue.
5. Your Storage Pool is now created. Repeat step #2 if you have multiple RAID Array or disk for your EVS.

6. Go to Share Account menu and then click on Add.

7. Enter Username and Password you wish to create for your Storage allocation, then click OK.
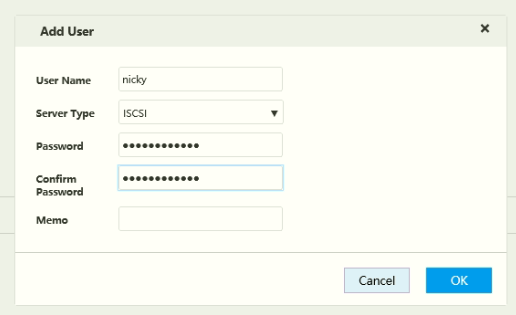
8. Your Share Account is now created.

9. Go to Share Folder menu and then click on Add.
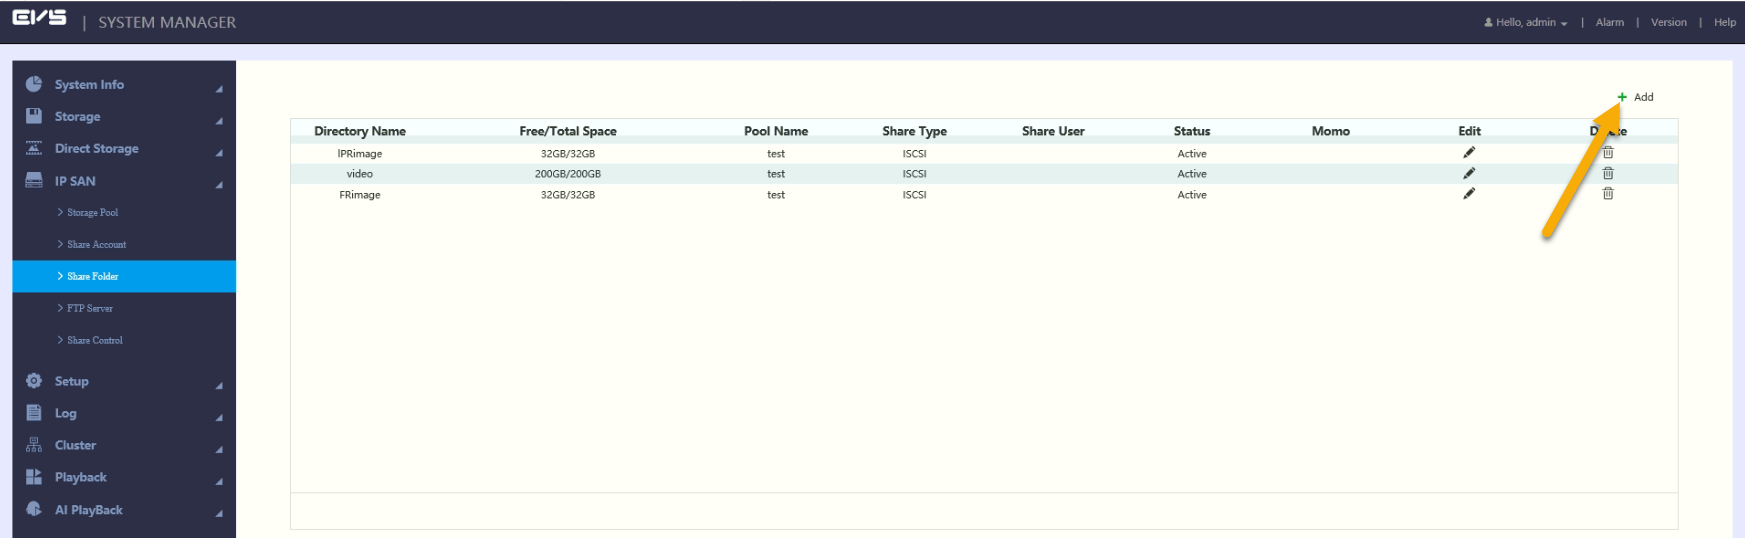
10. Enter the Directory Name, and then select your storage pool that created on step 2. Choose Share Type to ISCSI, and do not select any share user. Then, click OK.

11. Your share folder is now created. Repeat step #10 if you have multiple storage pool created for your EVS.
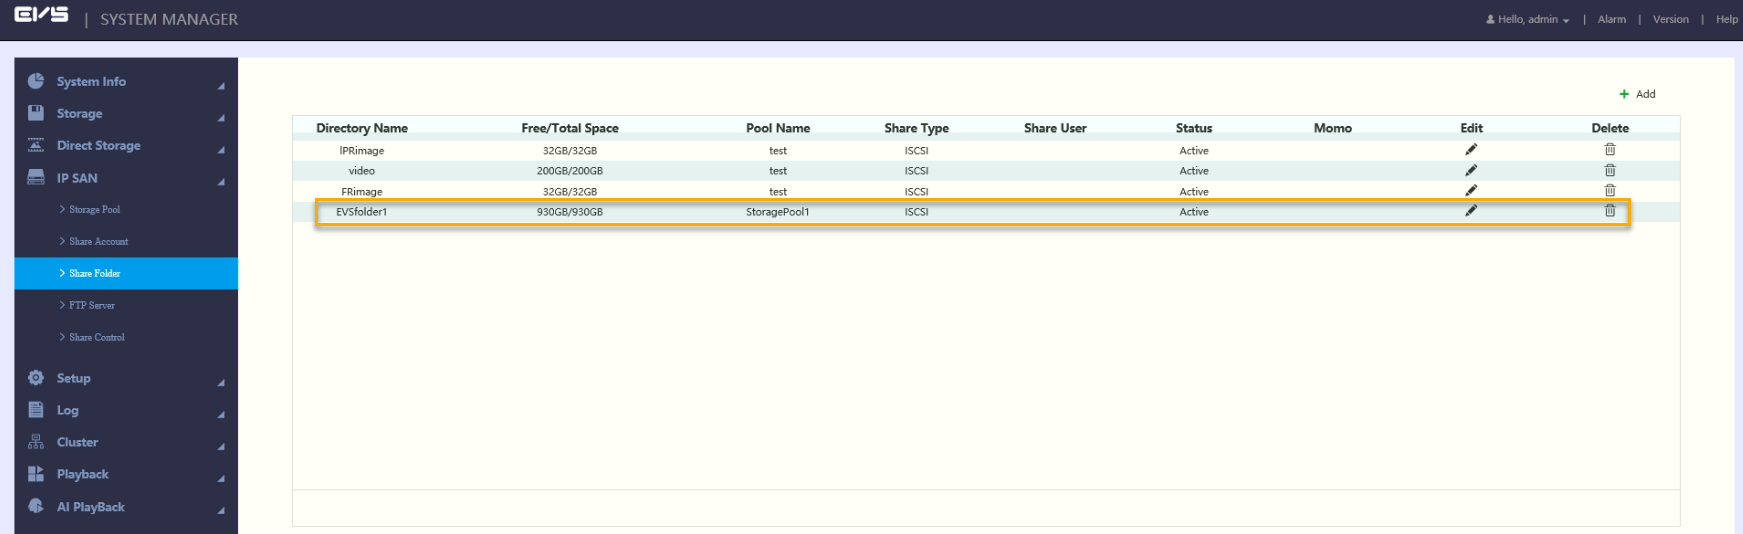
12. Your EVS is now ready to be added to DSS.
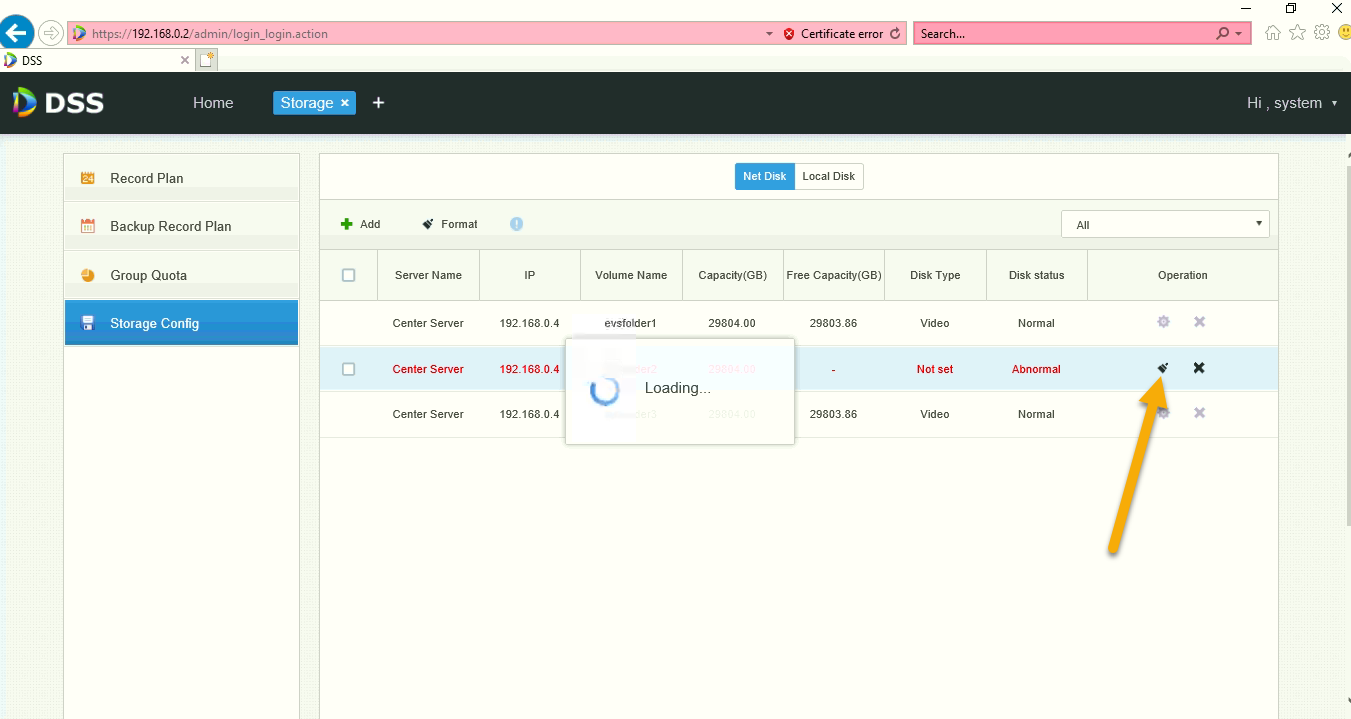
13. Login to DSS Web Manager, and go to Storage.
14. Go to Storage Config and click on Add.

15. Enter EVS IP Address and username and password that created under Share Account in EVS (Step #7). Click OK.

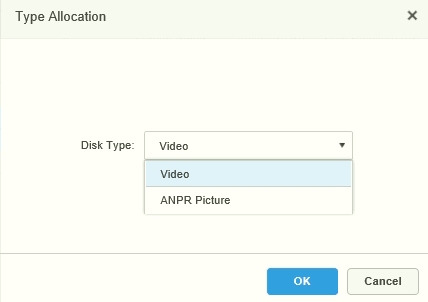
16. DSS will retrieve all existing storage pool that created in EVS. Click on the brush icon to to format and initialize the HDD in DSS. You will be asked whether you want to set this storage pool for video recording or ANPR Picture.
If you have multiple storage pool, you must click format on each storage pool.
17. Once HDD is formatted, the storage pool status will show Normal, and this is ready to use.
