
iMaxCamPro (Bronze, Gold, Platinum) defaulting configurations remotely
:
from
to
Defaulting Configurations (remotely)
Bronze, Gold, and Platinum iMaxCamPro DVR's
Back to iMaxCamPro Support | Support Home
Using a mouse will be much easier to maneuver through all the menu items.
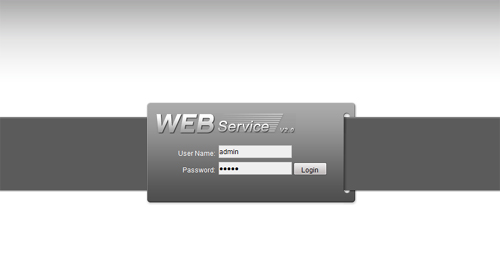
Step 1
Login to your DVR system via WebService using Internet Explorer. To do this, type in your DVR's ip address in the internet explorer address bar. Default administrator login is “admin / admin”.
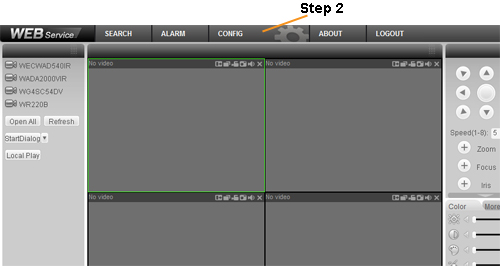
Step 2
Once logged in, click on the “CONFIG” button from the top menu.
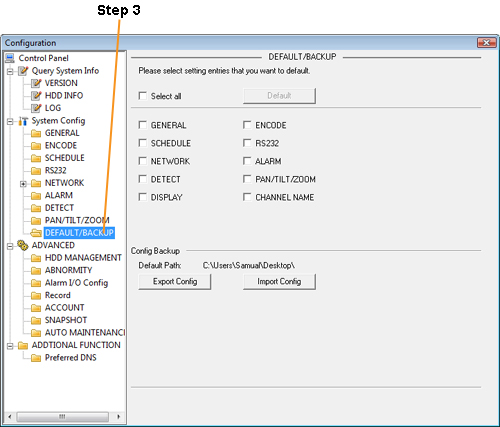
Step 3
Now select “DEFAULT/BACKUP.”
Step 4
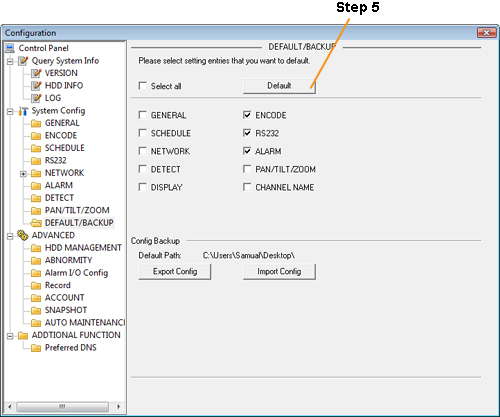
Once inside the default menu, you should see all the different configurations you can set back to factory defaults. Un-highlight individual configurations for it NOT to have the DVR default them. If the check mark box is highlighted, it’s indicating that it will be defaulting that configuration page.
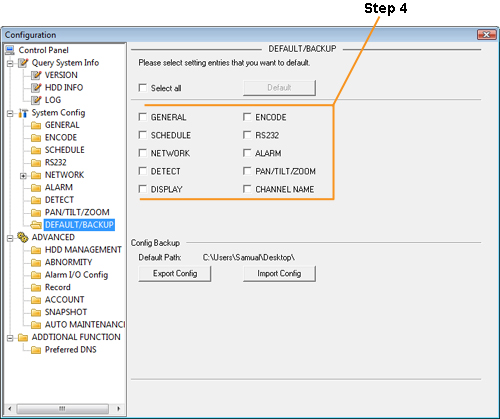
Step 5
After checking all boxes for settings you want to be default, press the "Default" button . Your selected configurations should now be set back to factory defaulted settings.
Bronze, Gold, and Platinum iMaxCamPro DVR's
Back to iMaxCamPro Support | Support Home
Using a mouse will be much easier to maneuver through all the menu items.
Step 1
Login to your DVR system via WebService using Internet Explorer. To do this, type in your DVR's ip address in the internet explorer address bar. Default administrator login is “admin / admin”.
Step 2
Once logged in, click on the “CONFIG” button from the top menu.
Step 3
Now select “DEFAULT/BACKUP.”
Step 4
Once inside the default menu, you should see all the different configurations you can set back to factory defaults. Un-highlight individual configurations for it NOT to have the DVR default them. If the check mark box is highlighted, it’s indicating that it will be defaulting that configuration page.
Step 5
After checking all boxes for settings you want to be default, press the "Default" button . Your selected configurations should now be set back to factory defaulted settings.

