
iMaxCamPro (Bronze, Gold, Platinum) How to Setup a Record Plan (Win PSS)
How to Setup a Record Plan in the PSS Client (Win PSS)
Bronze, Gold, and Platinum iMaxCamPro DVR's
Back to iMaxCamPro Support | Support Home
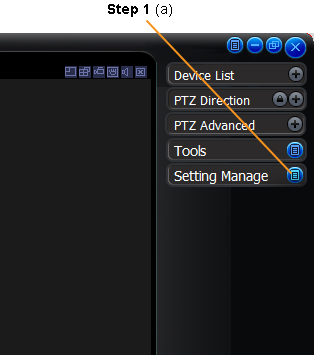
Step 1
Open up the Record Plan Config menus by first clicking on Setting Manage dropdown button (see Step 1 a) below.
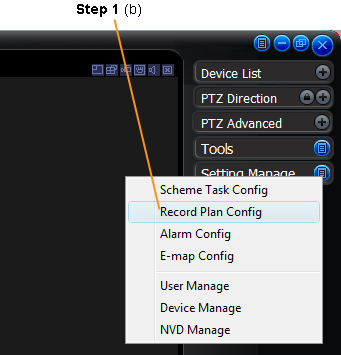
Next, click on Record Plan Config, as shown below in Step 1 (b).
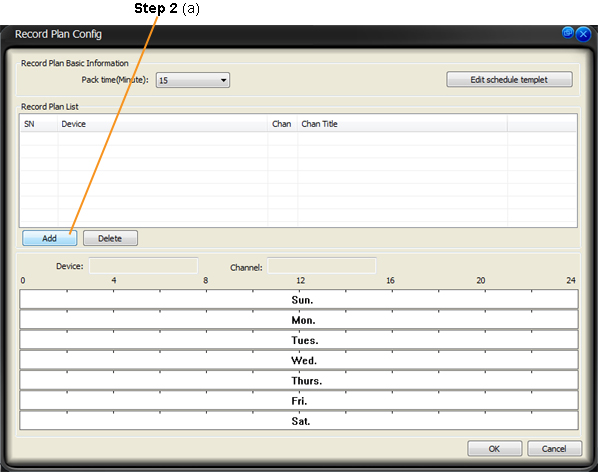
Step 2
You should now see the Record Plan Config window. click the Add button as shown below in Step 2 (a).
Next, select your Device from the drop down list and select your Channel (camera) from the next drop down list (Step 2 b).
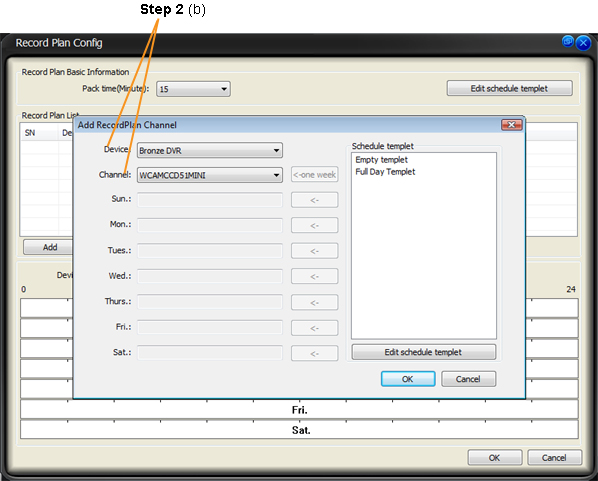
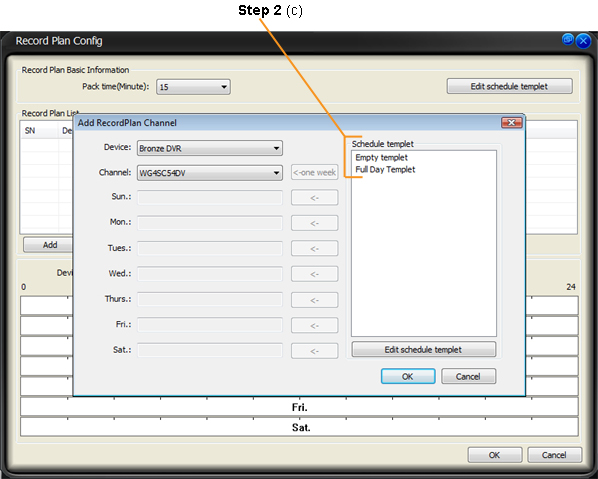
Next, select your Schedule Template (Step 2c).
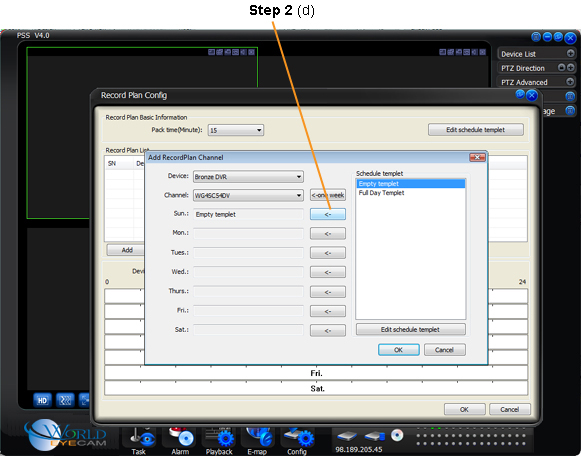
Apply that recording template to each day you want to setup the plan for by clicking on the arrow image next to the day as shown below in Step 2 (d).
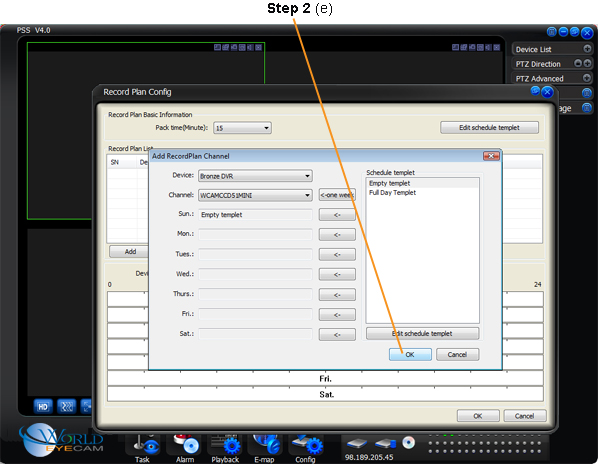
Next, click the OK button of the Add RecordPlan Channel window.
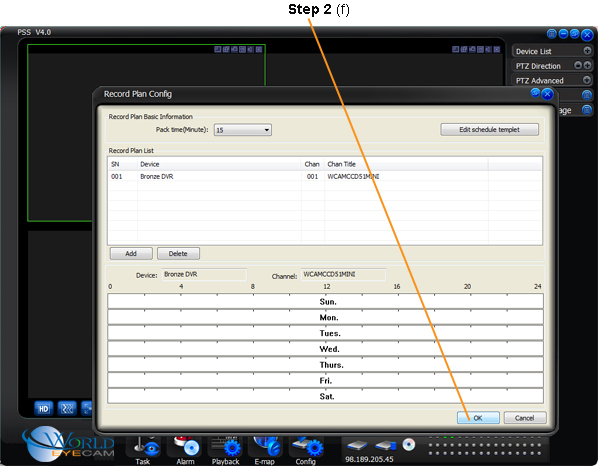
Lastly to complete Step 2, click the OK button of the Record Plan Config window.
Step 3
You should see a prompt saying the Record Plan Config was successfully saved.

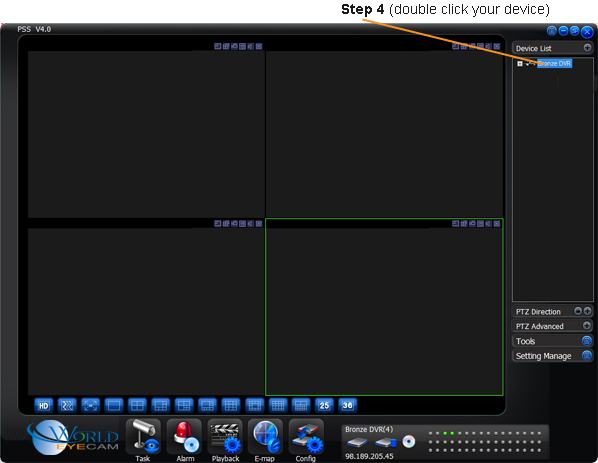
Step 4
Connect to your Device (DVR, IP Camera, and NVR) by double-clicking on the device name in your device list.
Step 5
Click the Tools tab (Step 5a)
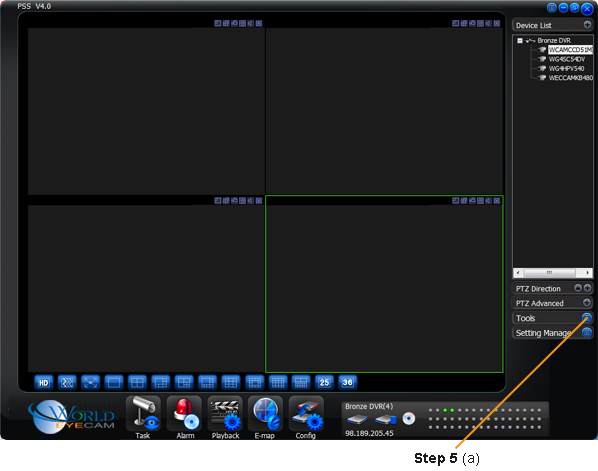
and then click Begin Record Plan (Step 5b)

Step 6
Now based off of your Record Plan (step 2) videos are being created in the default folder which is C:\PSS\Record.
You can alter the location of where they are being saved by going in to Config Options button towards the bottom of the interface.
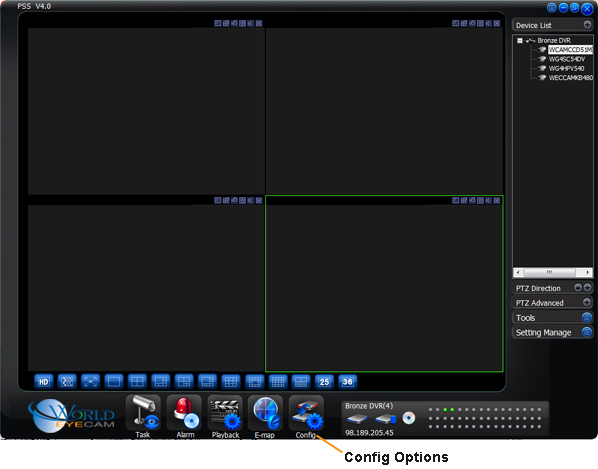
You will see an option named Recorded File Path. Select the ��� next to the field to add a new directory path.
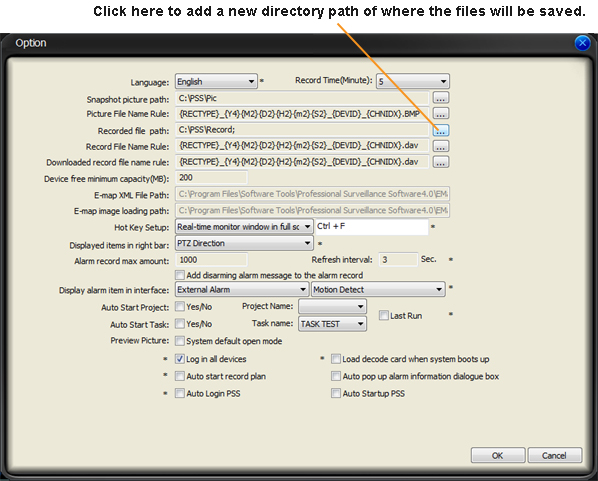
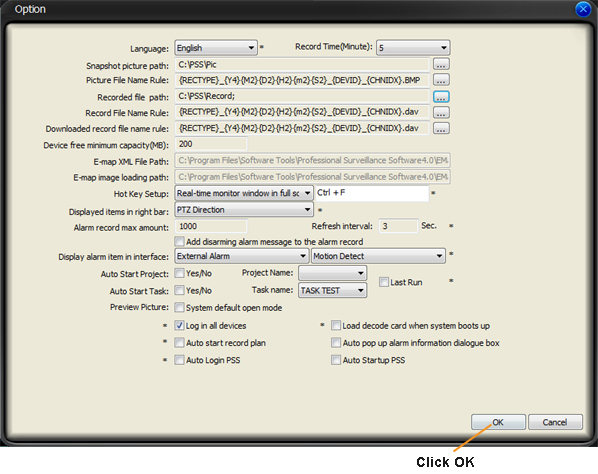
After you set your Record File Path, click OK to save.
Bronze, Gold, and Platinum iMaxCamPro DVR's
Back to iMaxCamPro Support | Support Home
Step 1
Open up the Record Plan Config menus by first clicking on Setting Manage dropdown button (see Step 1 a) below.
Next, click on Record Plan Config, as shown below in Step 1 (b).
Step 2
You should now see the Record Plan Config window. click the Add button as shown below in Step 2 (a).
Next, select your Device from the drop down list and select your Channel (camera) from the next drop down list (Step 2 b).
Next, select your Schedule Template (Step 2c).
Apply that recording template to each day you want to setup the plan for by clicking on the arrow image next to the day as shown below in Step 2 (d).
Next, click the OK button of the Add RecordPlan Channel window.
Lastly to complete Step 2, click the OK button of the Record Plan Config window.
Step 3
You should see a prompt saying the Record Plan Config was successfully saved.
Step 4
Connect to your Device (DVR, IP Camera, and NVR) by double-clicking on the device name in your device list.
Step 5
Click the Tools tab (Step 5a)
and then click Begin Record Plan (Step 5b)
Step 6
Now based off of your Record Plan (step 2) videos are being created in the default folder which is C:\PSS\Record.
You can alter the location of where they are being saved by going in to Config Options button towards the bottom of the interface.
You will see an option named Recorded File Path. Select the ��� next to the field to add a new directory path.
After you set your Record File Path, click OK to save.

