
iMaxCamPro (Bronze, Gold, Platinum) New Connections (Mac PSS Software)
:
from
to
New Connections (Mac PSS Software)
Bronze, Gold, and Platinum iMaxCamPro DVR's
Back to iMaxCamPro Support | Support Home
Step 1
Start by downloading the newest version of the Pro Surveillance software (PSS).
- Windows users download here
- MAC users download here
Step 2
Once the software is properly installed, login in to the software using your login and password (default is "admin/admin").
Step 3
Open up the Device List by clicking "Device Manage" from the Device List dropdown menu.
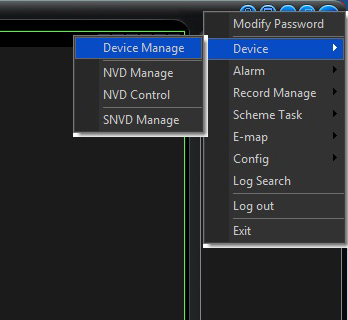
Step 4
Now you should see the "Device Manage" screen below. Click on the "Add" button.

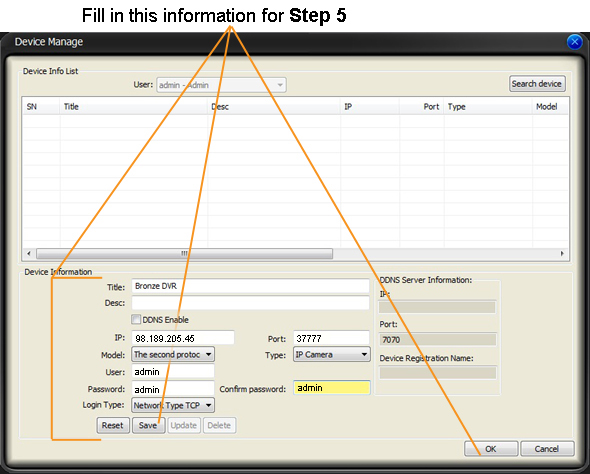
Step 5
Now you may enter in the information and Save when complete (iMaxCamPro Live Demo Users please enter in the same information as seen below).
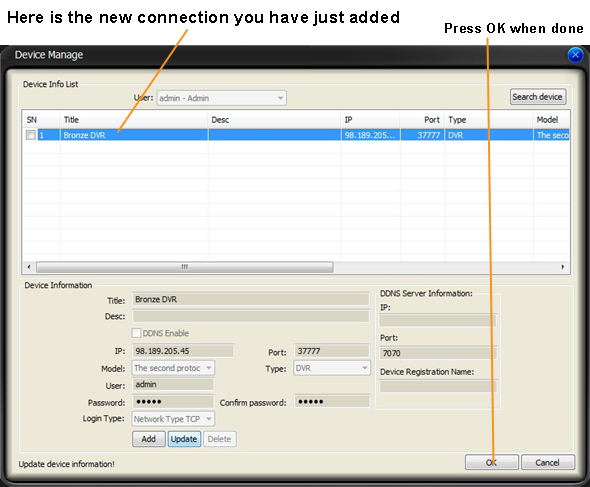
Step 6
The new connection should now be listed in the Device Manager like in the below example. Press OK when done.
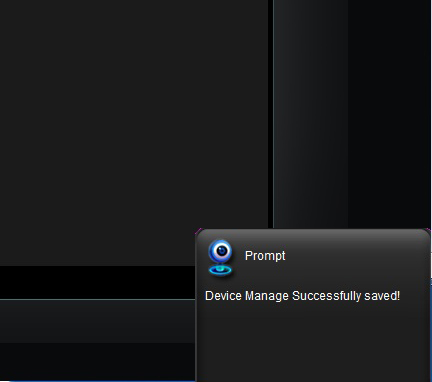
Step 7
On the bottom right of the PSS Surveillance screen you should see confirmation that the device settings have been saved like below.
Step 9
You will now see your new device in the Device List as shown below.
Step 10
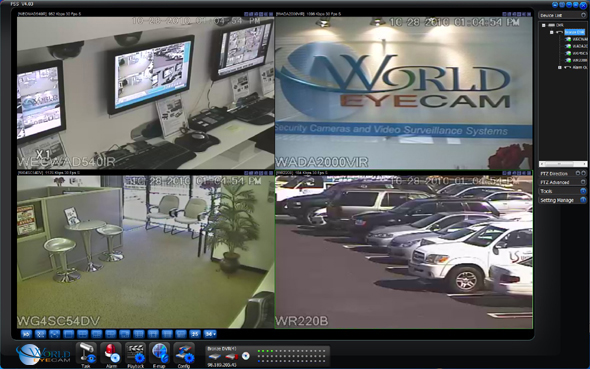
That's it, you have now added your new device!
Bronze, Gold, and Platinum iMaxCamPro DVR's
Back to iMaxCamPro Support | Support Home
Step 1
Start by downloading the newest version of the Pro Surveillance software (PSS).
- Windows users download here
- MAC users download here
Step 2
Once the software is properly installed, login in to the software using your login and password (default is "admin/admin").
Step 3
Open up the Device List by clicking "Device Manage" from the Device List dropdown menu.
Step 4
Now you should see the "Device Manage" screen below. Click on the "Add" button.
Step 5
Now you may enter in the information and Save when complete (iMaxCamPro Live Demo Users please enter in the same information as seen below).
Step 6
The new connection should now be listed in the Device Manager like in the below example. Press OK when done.
Step 7
On the bottom right of the PSS Surveillance screen you should see confirmation that the device settings have been saved like below.
Step 9
You will now see your new device in the Device List as shown below.
Step 10
That's it, you have now added your new device!

