iMaxCamPro (Bronze, Gold, Platinum) Making a task (Mac PSS)
:
from
to
Making a Task (Mac PSS)
Bronze, Gold, and Platinum iMaxCamPro DVR's
Back to iMaxCamPro Support | Support Home
Step 1
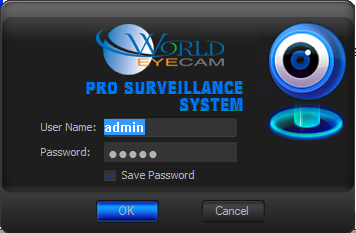
Start off by launching the PSS software application. If you haven’t changed it yet, use the user name “admin” and password as “admin”.
Step 2
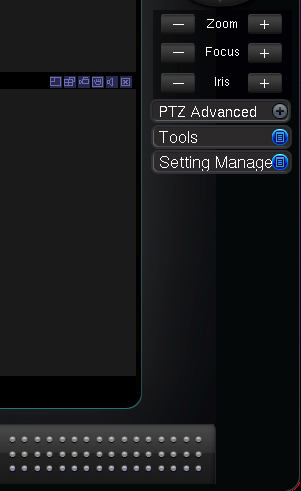
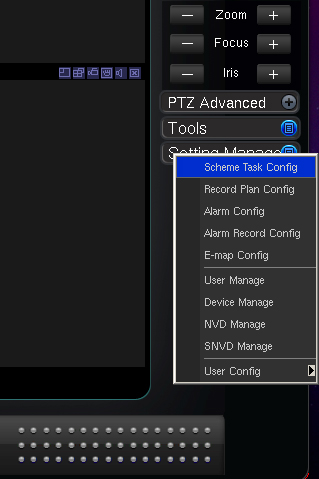
Once logged in to the software, click on the ‘Settings Manage” Tab then “Scheme Task Config’
Step 3
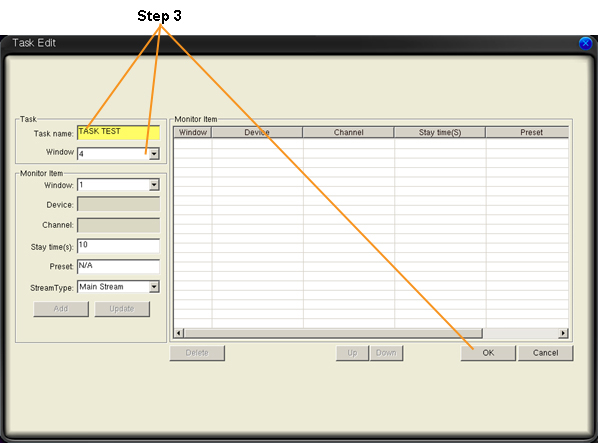
In the Scheme Task window click on ‘New’ and enter a Task name, select how many windows (cameras) you want in your task. Then click ‘OK’
Step 4
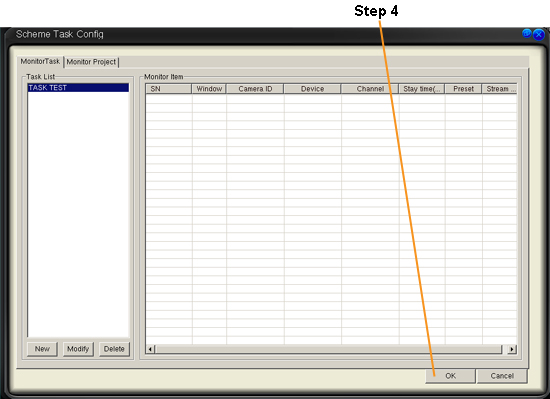
Click "OK" now in the Scheme Task window.
Step 5
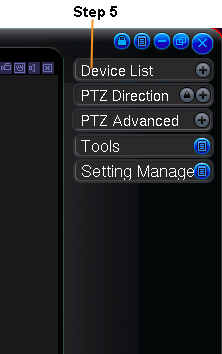
Now Login to your DVR by double clicking on your DVR in the Device List.
Step 6
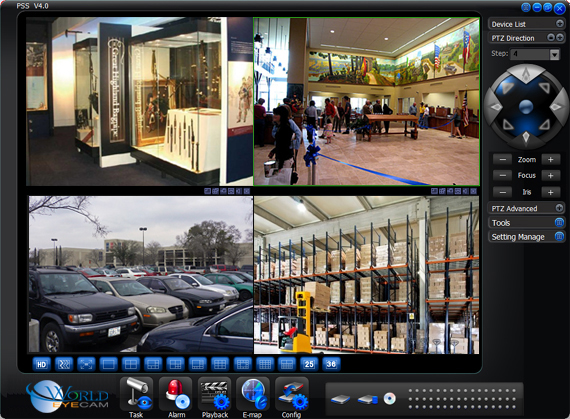
When connected to your device, select the cameras you want to be displayed for the task. You can select certain cameras or drag and drop the device to the monitor window to add all the camera at once.
Step 7
Once you have the cameras playing in the monitor window, just control-click in any video window and select ‘Add All Windows to Task’ and select the task.
Step 8
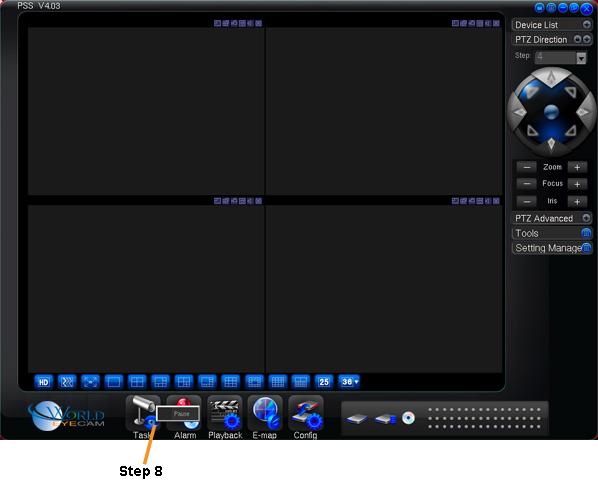
Now you have your cameras added onto your Task, next time you load the PSS you can click on the ‘Task Icon’ at the bottom and select your task. This will connect to your DVR or DVR’s and load those cameras you added to the task.
Additional functions with Task:
Step 9
Set the PSS to auto start your Task when you login.
Click on ‘Full Menu’, Then ‘Config’ and click on ‘Option’.
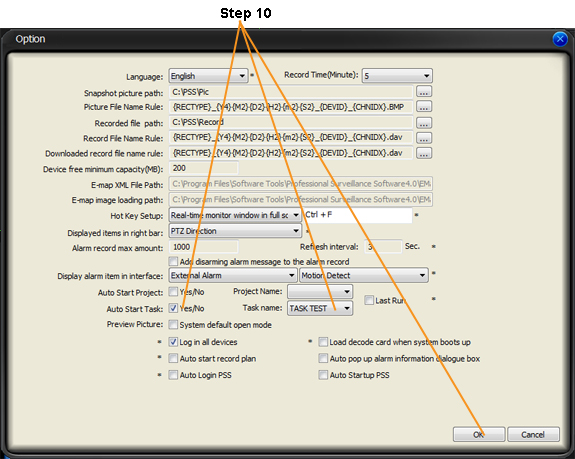
Step 10
Under the Auto Start Monitoring Setting: you will check the box next to ‘Auto Start Task’ then select your ‘Task name’ in the drop down menu, and then click OK
You can set any PTZ that might by on your Task to go to a Preset once the task is started.
Step 11
Click on Scheme Task Config
Step 12
Select your task from the task list and click modify.
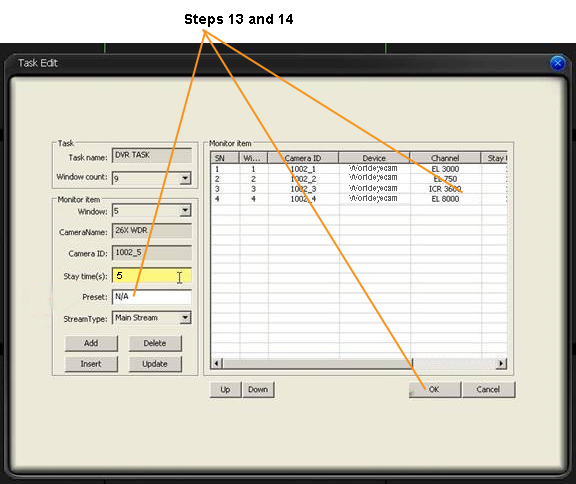
Step 13
Select your PTZ camera in the ‘Monitor Item’ window
Step 14
Now enter in the Preset you want that PTZ to go to once the task is started.
Bronze, Gold, and Platinum iMaxCamPro DVR's
Back to iMaxCamPro Support | Support Home
Step 1
Start off by launching the PSS software application. If you haven’t changed it yet, use the user name “admin” and password as “admin”.

Step 2
Once logged in to the software, click on the ‘Settings Manage” Tab then “Scheme Task Config’


Step 3
In the Scheme Task window click on ‘New’ and enter a Task name, select how many windows (cameras) you want in your task. Then click ‘OK’

Step 4
Click "OK" now in the Scheme Task window.

Step 5
Now Login to your DVR by double clicking on your DVR in the Device List.

Step 6
When connected to your device, select the cameras you want to be displayed for the task. You can select certain cameras or drag and drop the device to the monitor window to add all the camera at once.
Step 7
Once you have the cameras playing in the monitor window, just control-click in any video window and select ‘Add All Windows to Task’ and select the task.

Step 8
Now you have your cameras added onto your Task, next time you load the PSS you can click on the ‘Task Icon’ at the bottom and select your task. This will connect to your DVR or DVR’s and load those cameras you added to the task.

Additional functions with Task:
Step 9
Set the PSS to auto start your Task when you login.
Click on ‘Full Menu’, Then ‘Config’ and click on ‘Option’.
Step 10
Under the Auto Start Monitoring Setting: you will check the box next to ‘Auto Start Task’ then select your ‘Task name’ in the drop down menu, and then click OK

You can set any PTZ that might by on your Task to go to a Preset once the task is started.
Step 11
Click on Scheme Task Config
Step 12
Select your task from the task list and click modify.
Step 13
Select your PTZ camera in the ‘Monitor Item’ window
Step 14
Now enter in the Preset you want that PTZ to go to once the task is started.


