SmartPSS Backup
SmartPSS/Backup
Backup via SmartPSS
Description
This allows you to back up videos on SmartPSS.
Prerequisites
- SmartPSS installed on a Windows or Mac computer
- iMaxCamPro NVR with a stored recording
- Established network connection with the NVR
- The NVR added to SmartPSS
- Enough drive space for the video backup
Video Instructions
Step by Step Instructions
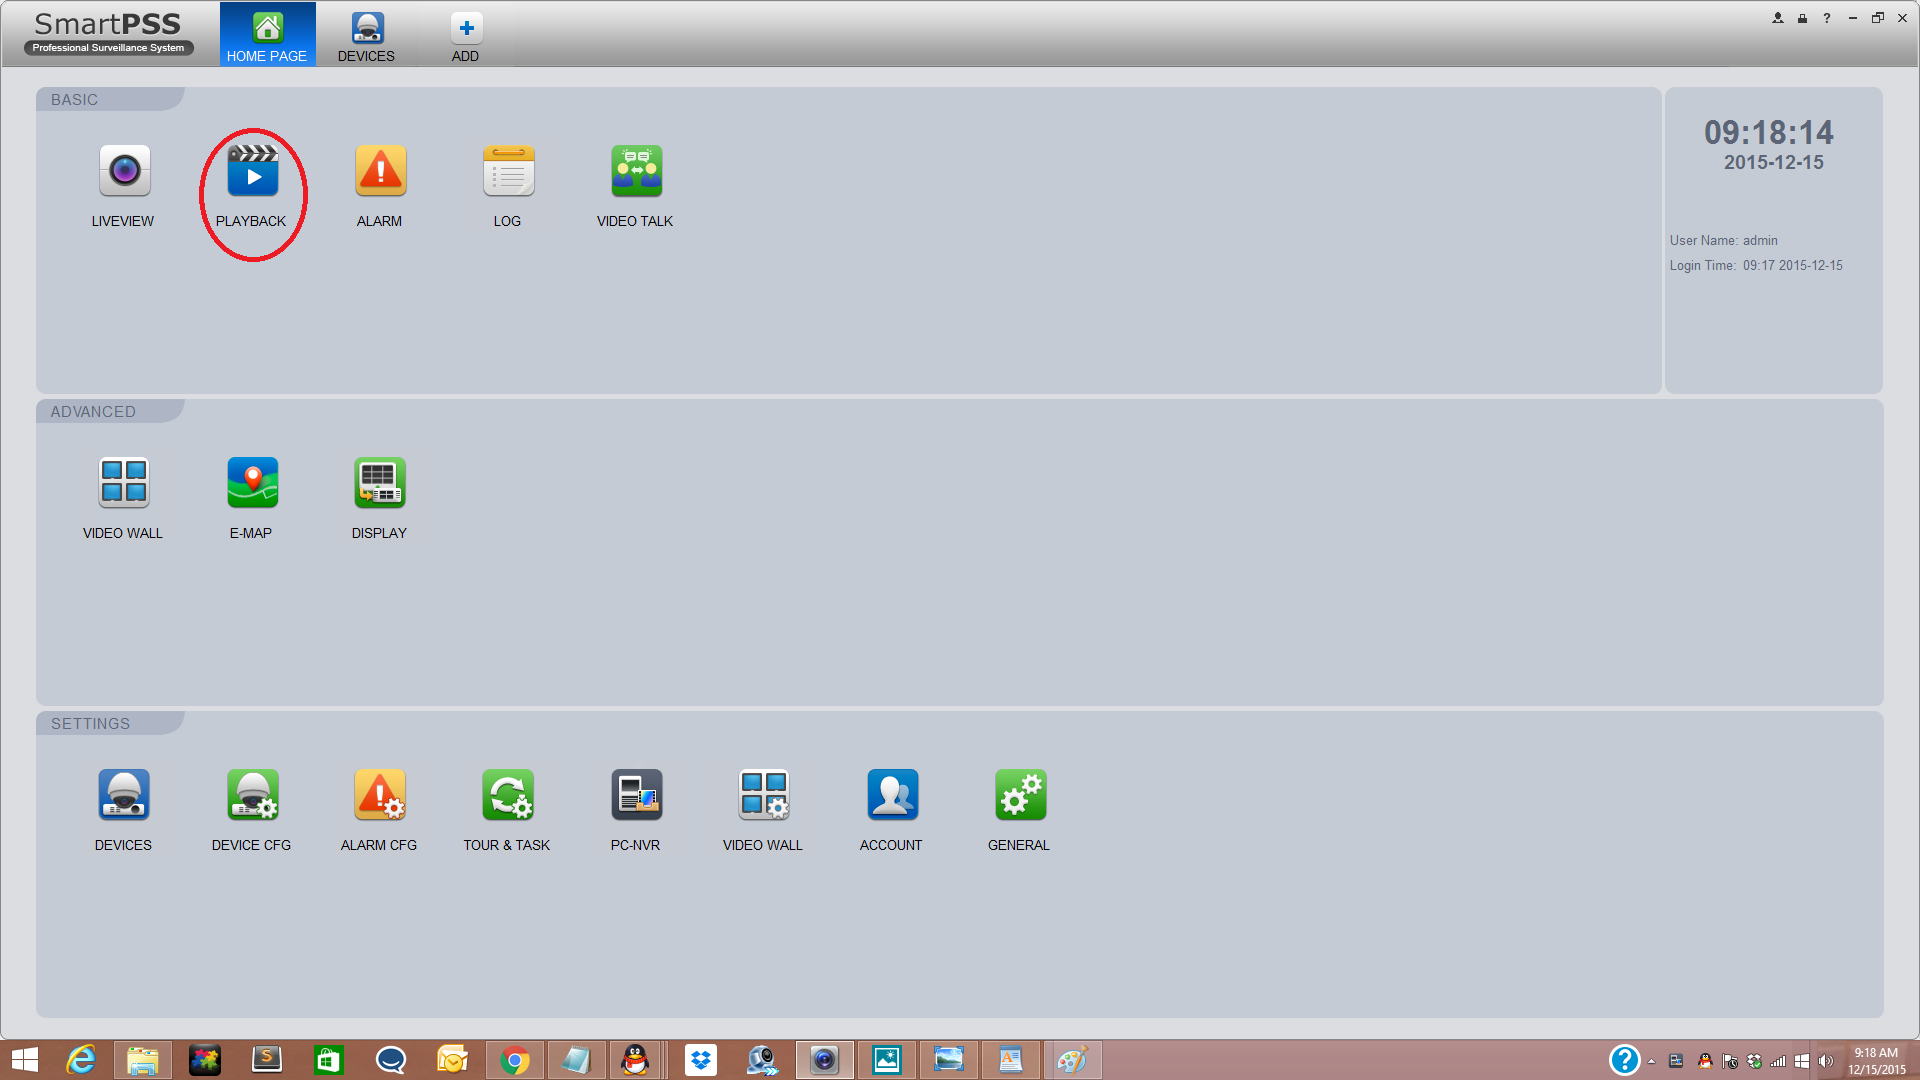
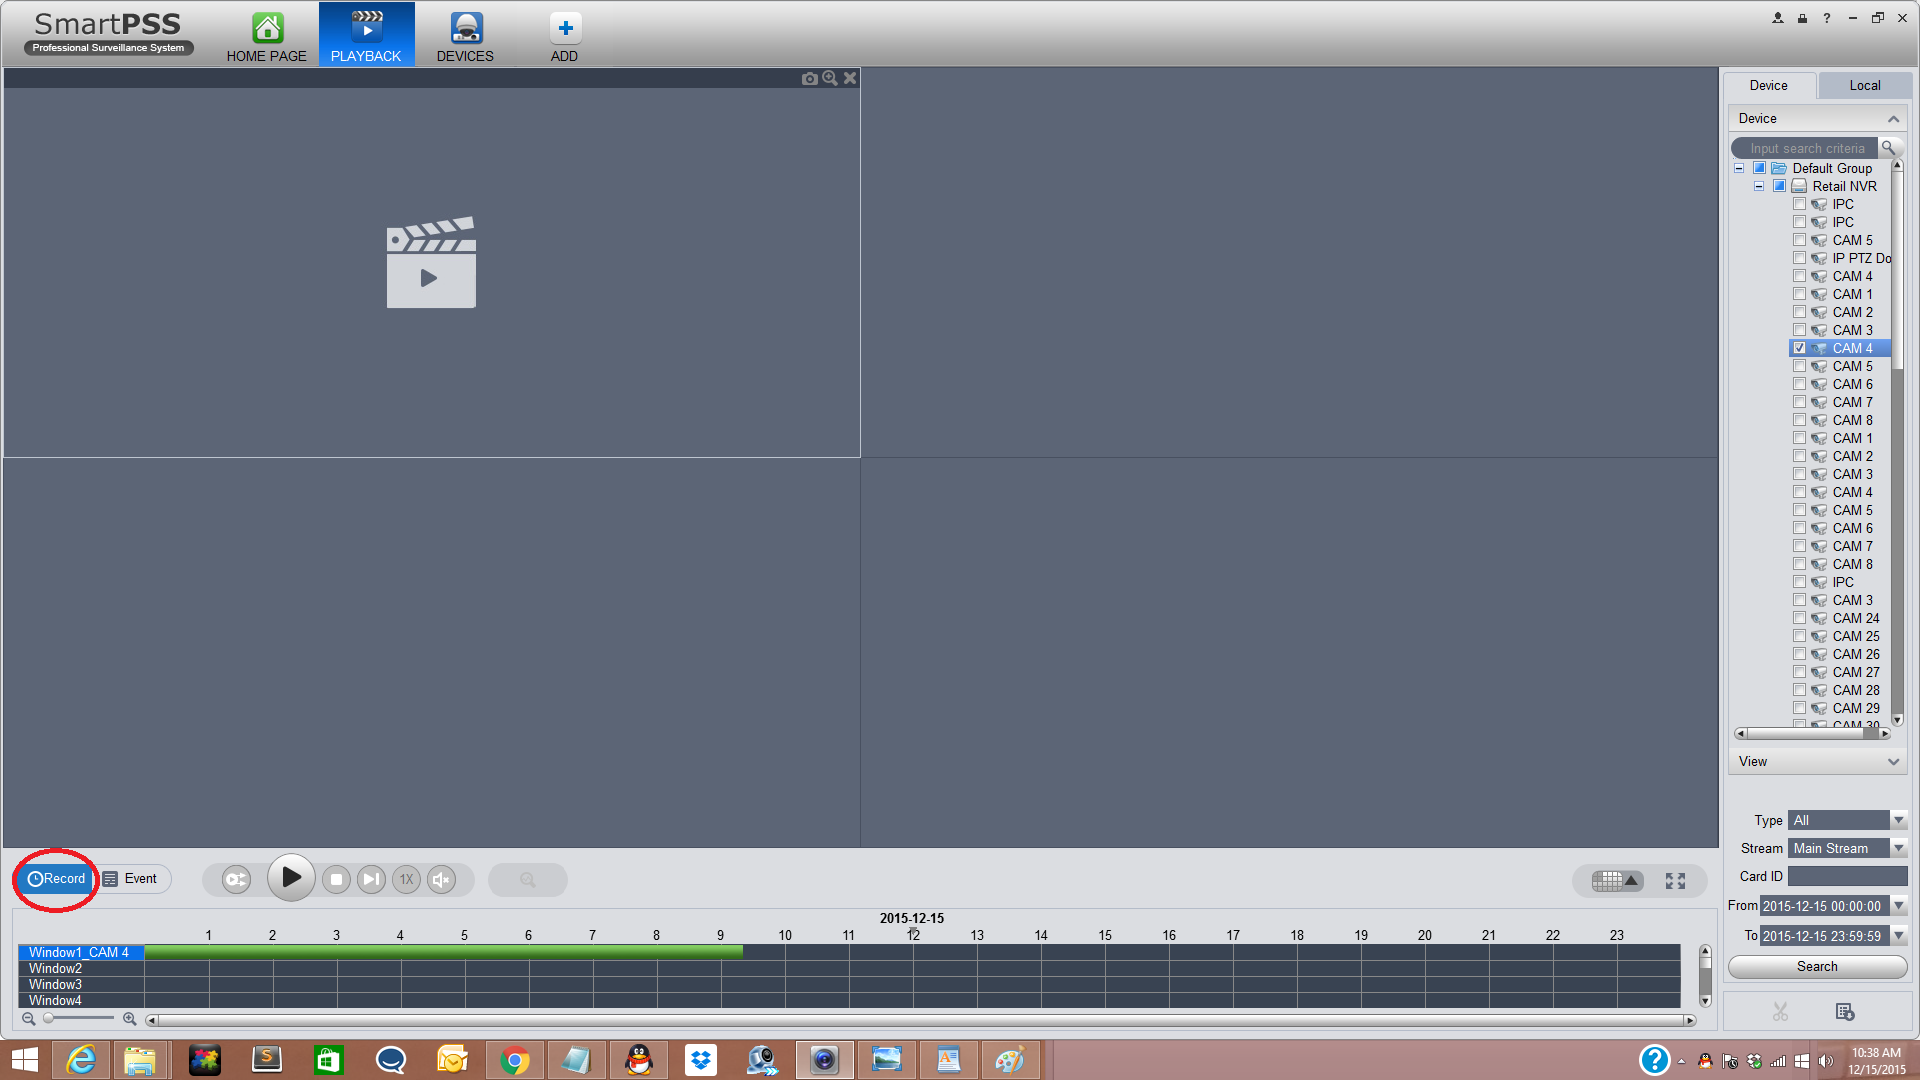
1. From the Home Page on SmartPSS select the “PlayBack Button”
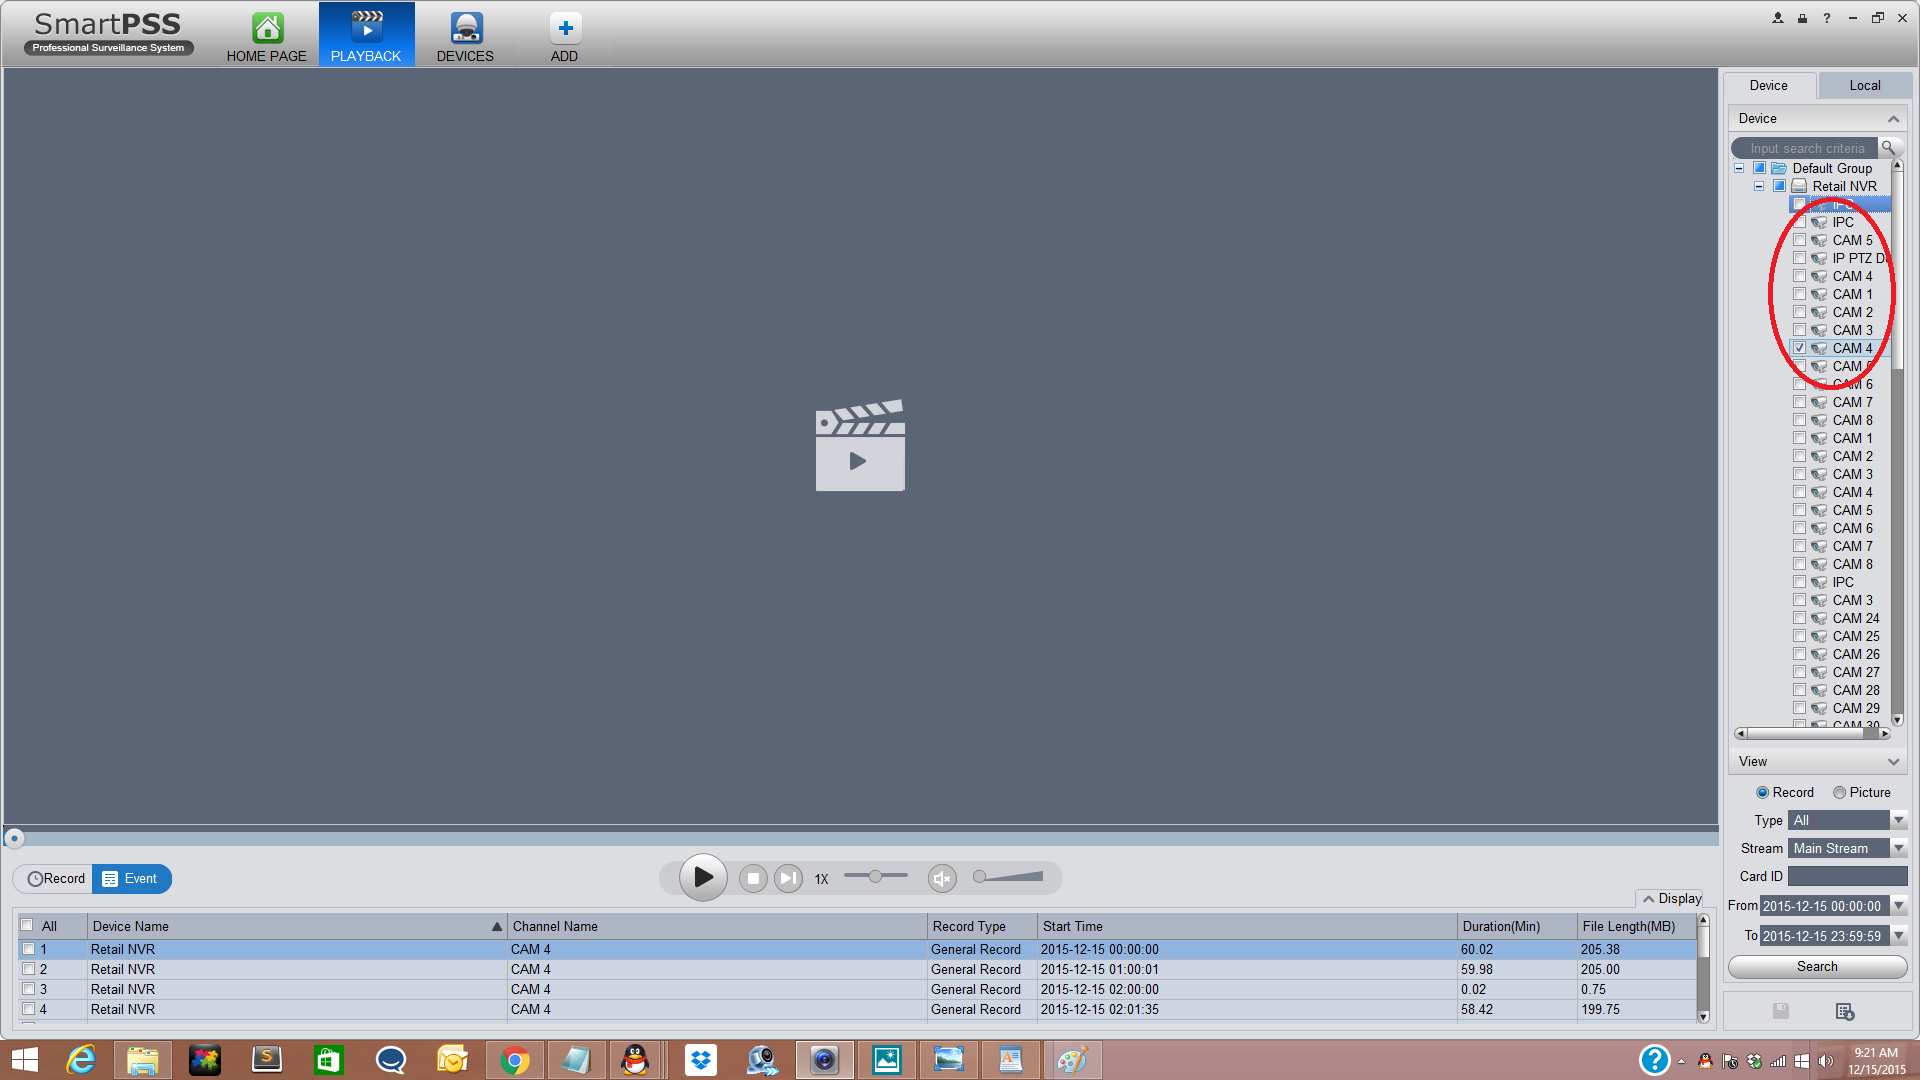
2. From the PlayBack Page on the right hand side select“Camera or Channel” for the footage you need to backup. Multiple cameras or channels may be selected.
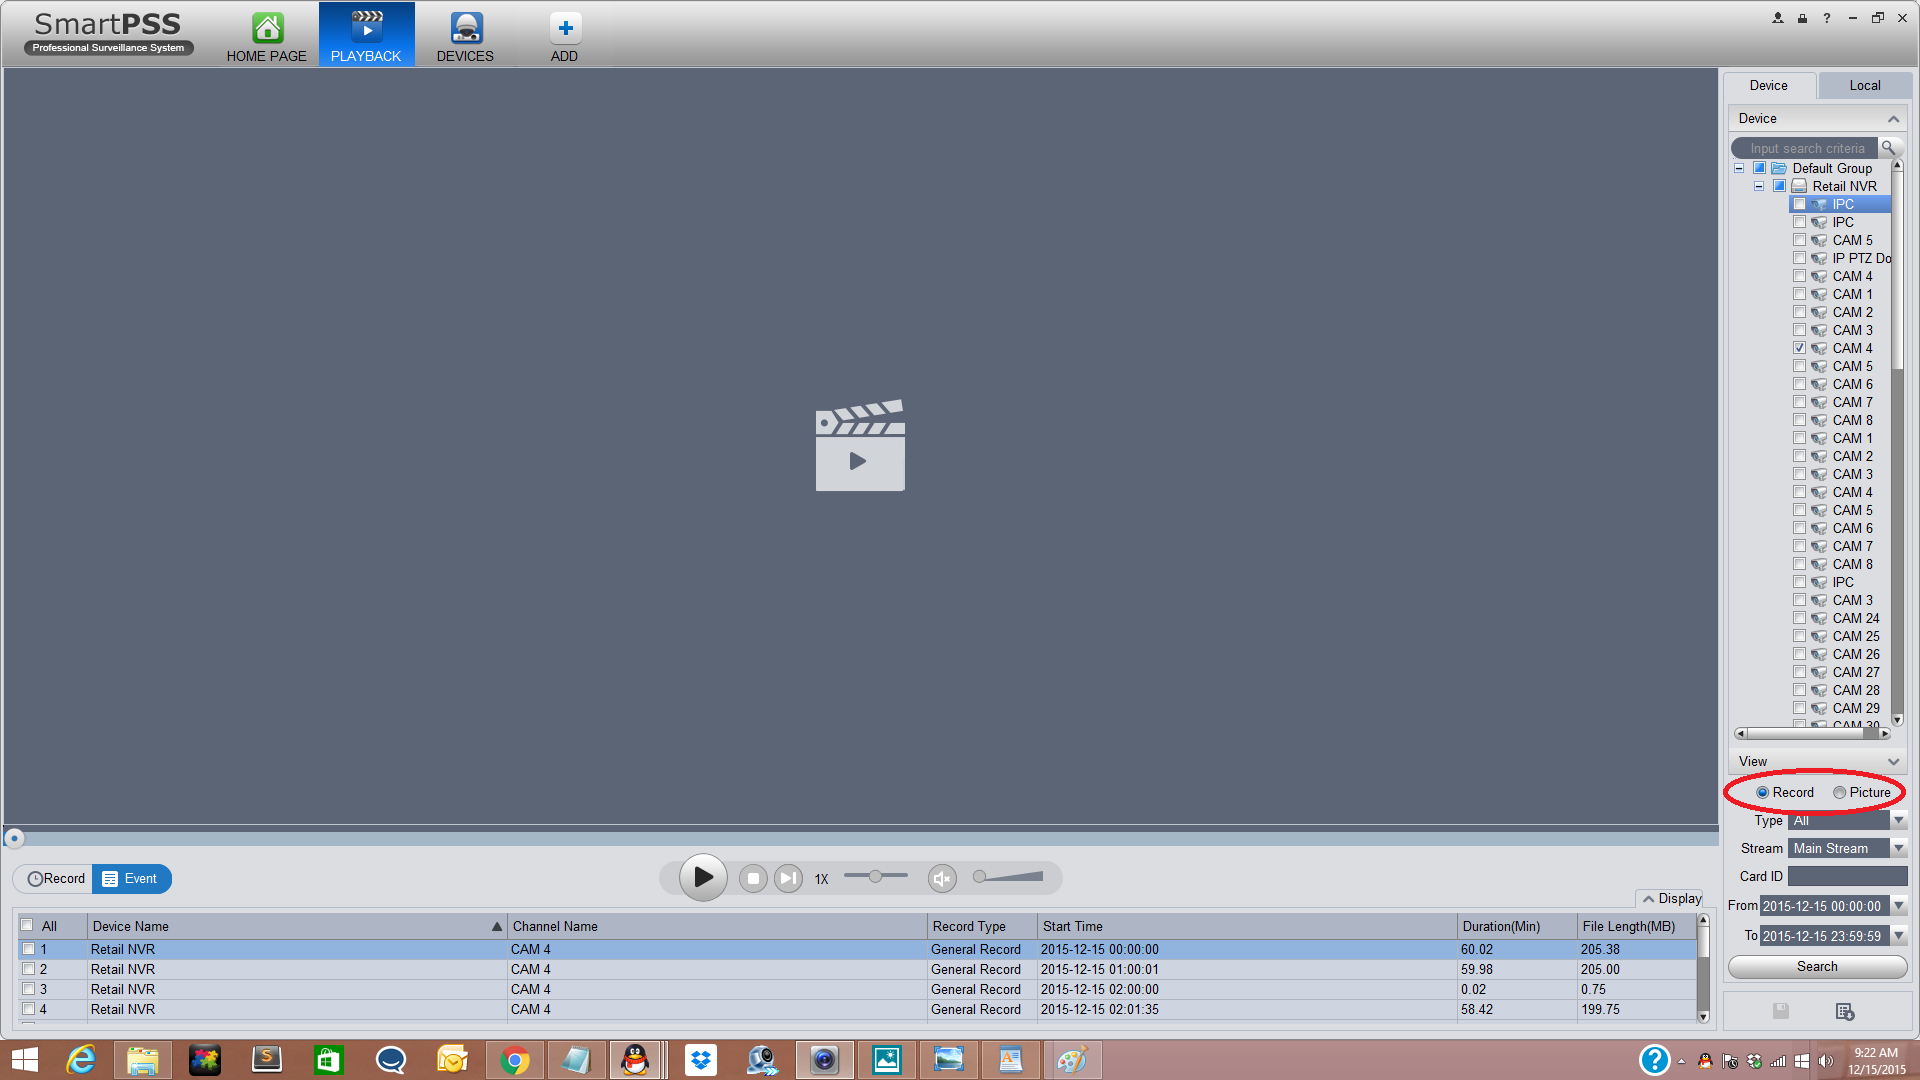
3 . Select "Record or Picture" for the content you would like to backup.
4. Select which one of the options "Type" (such as Motion Detection) you nedd to backup.
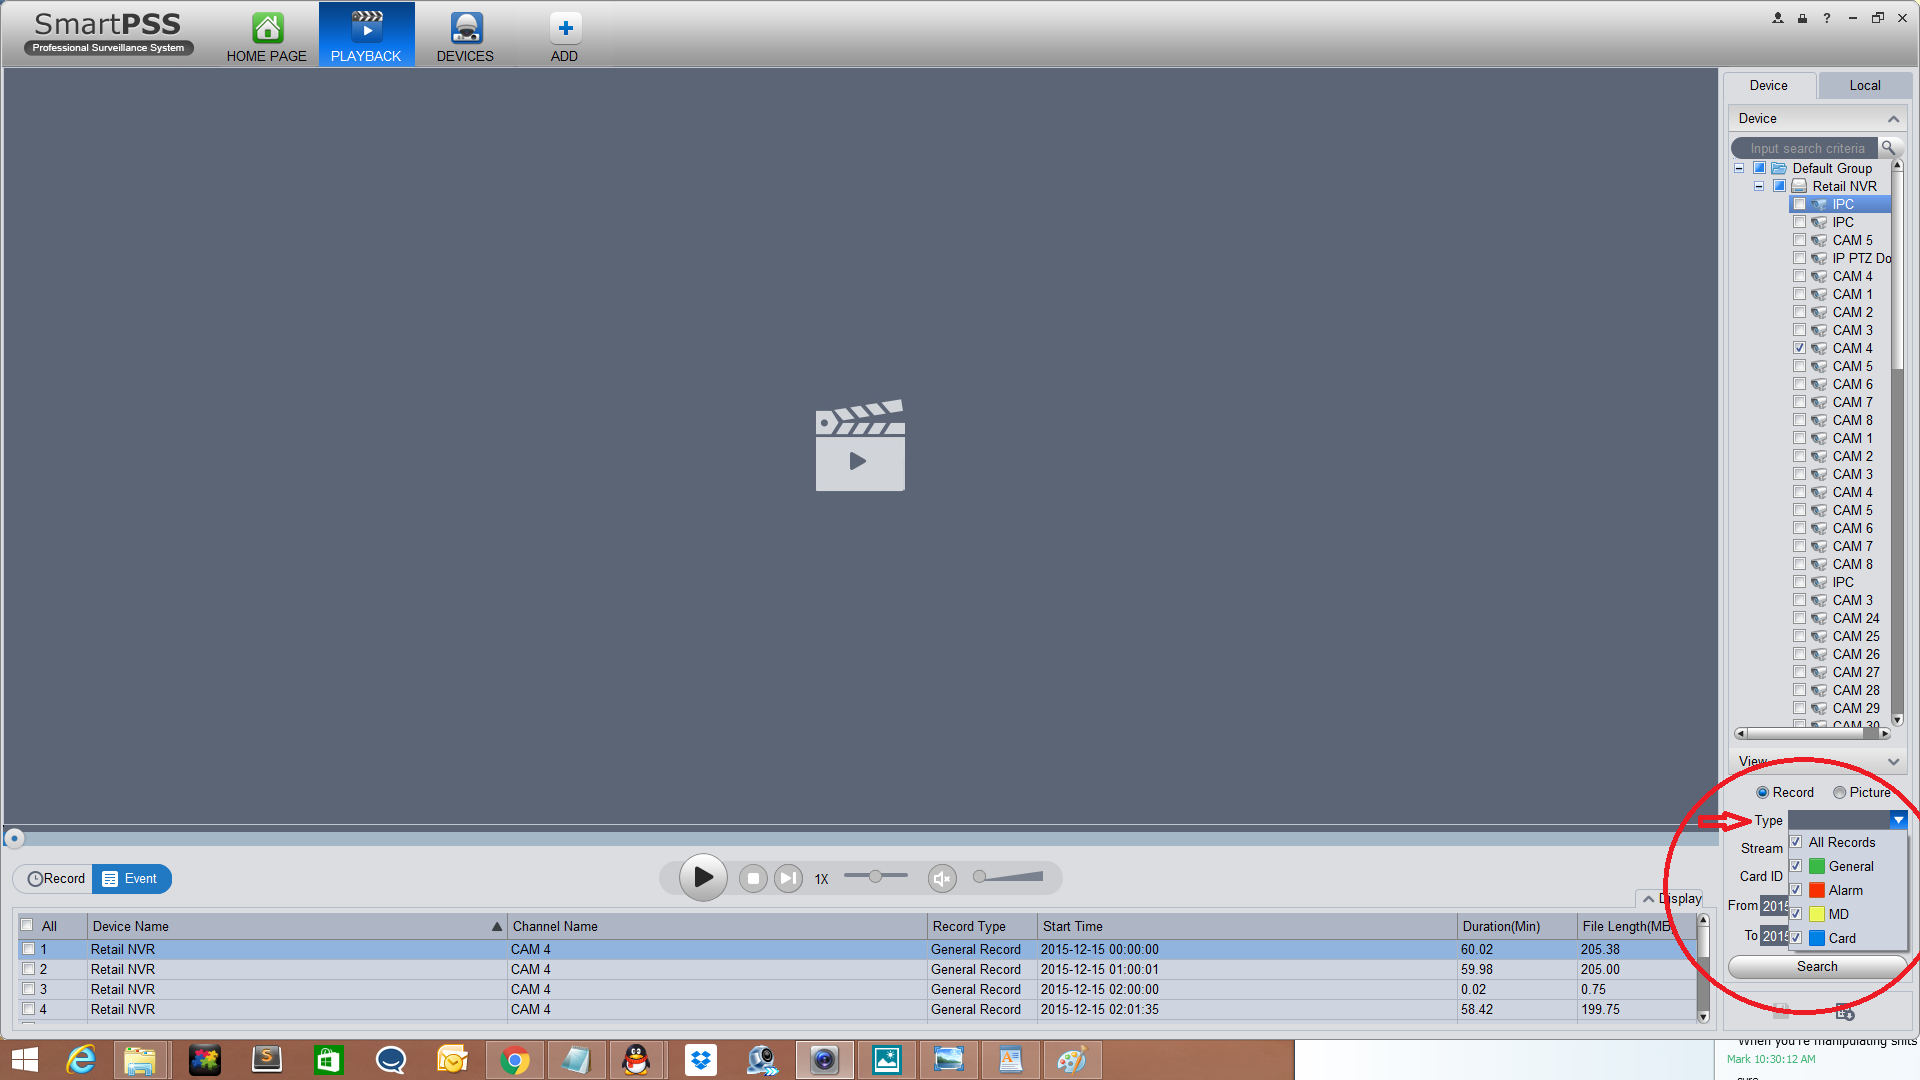
5. Select the stream "Main or Sub".
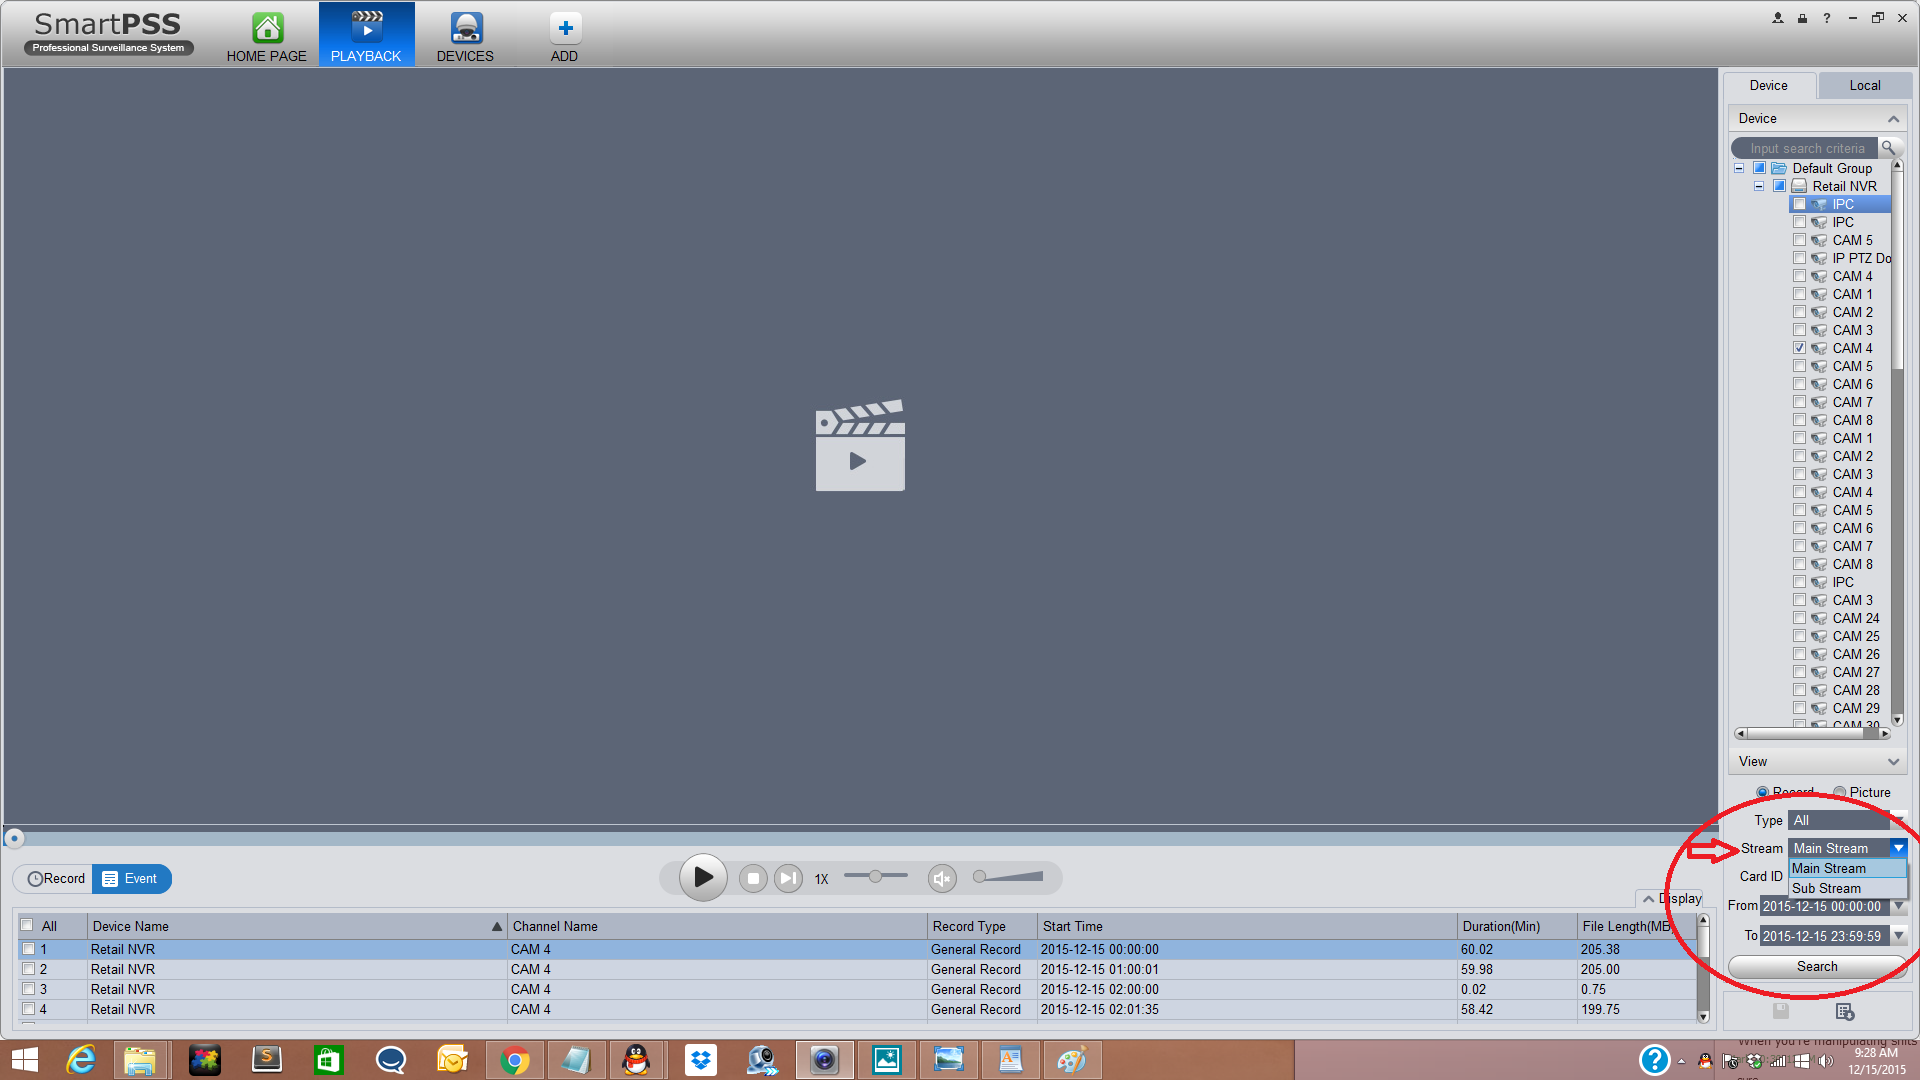
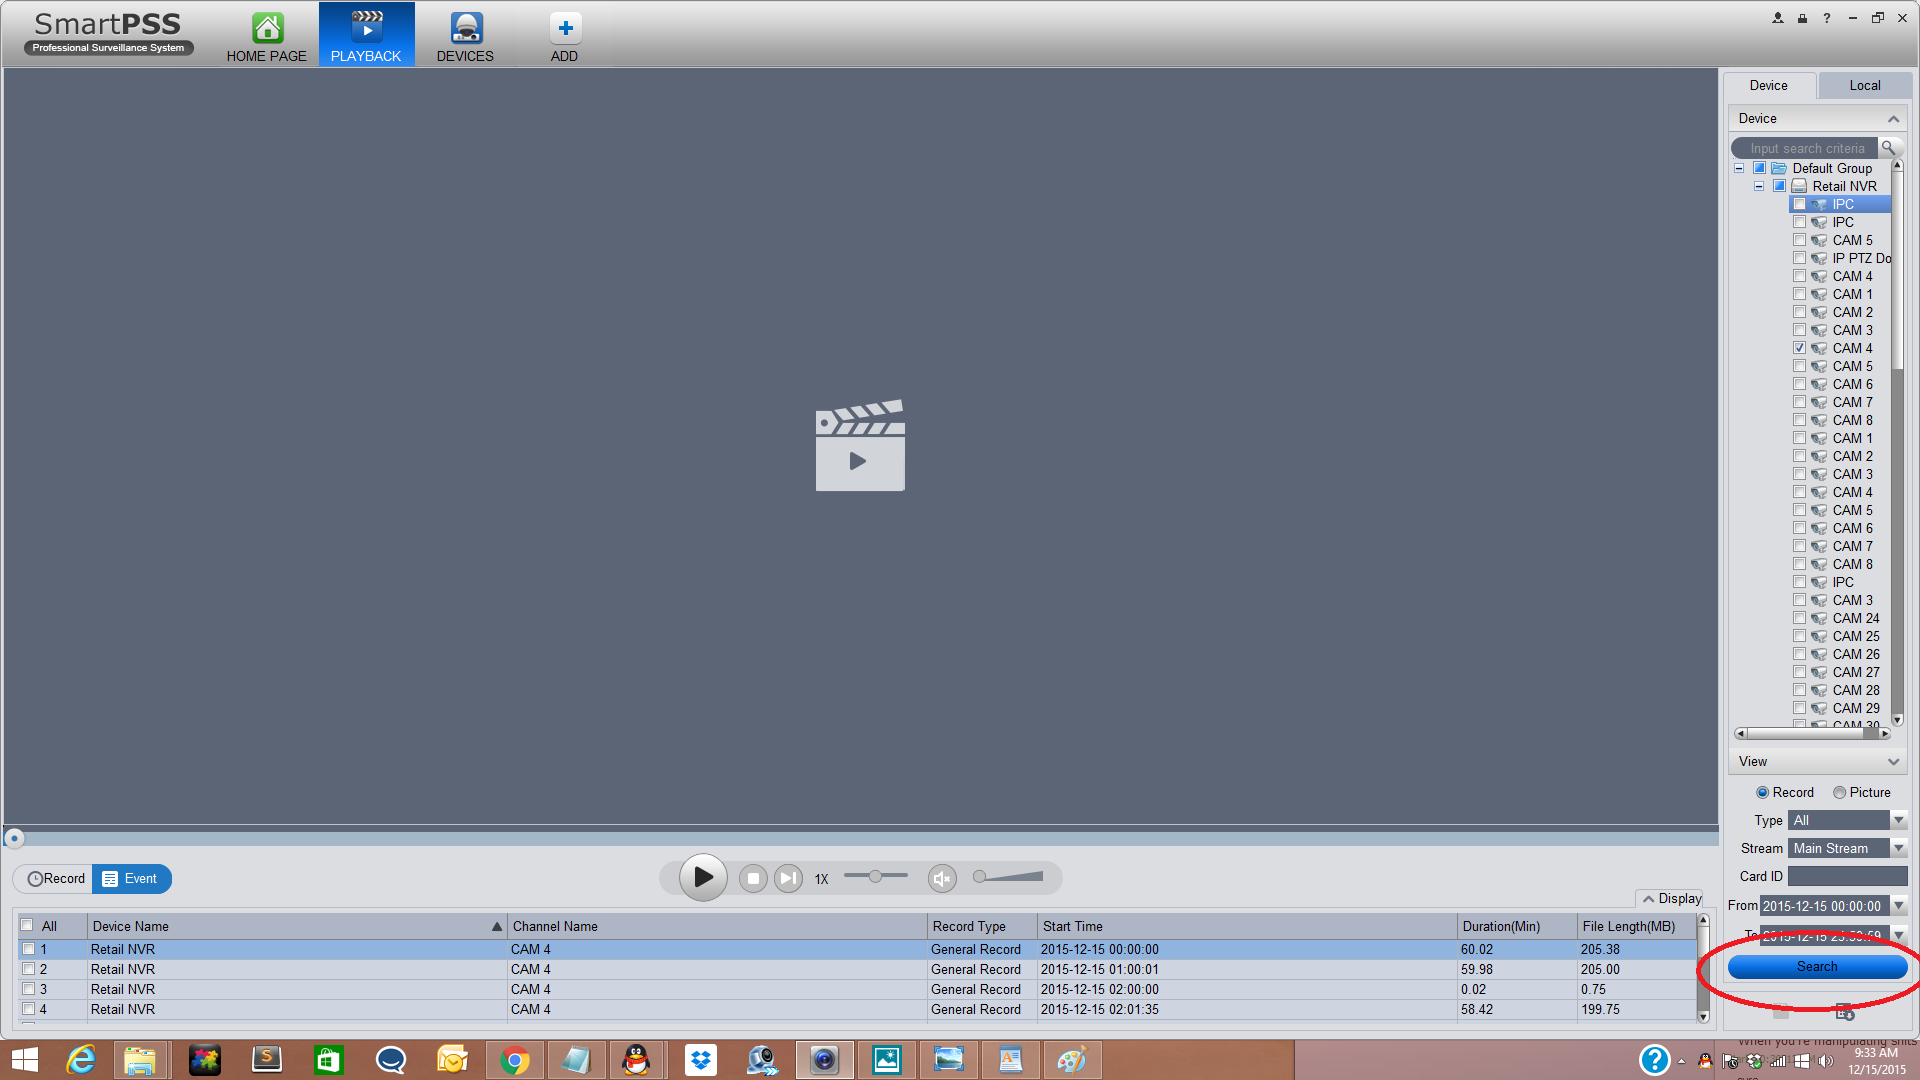
6. Select and choose “Date and time” .

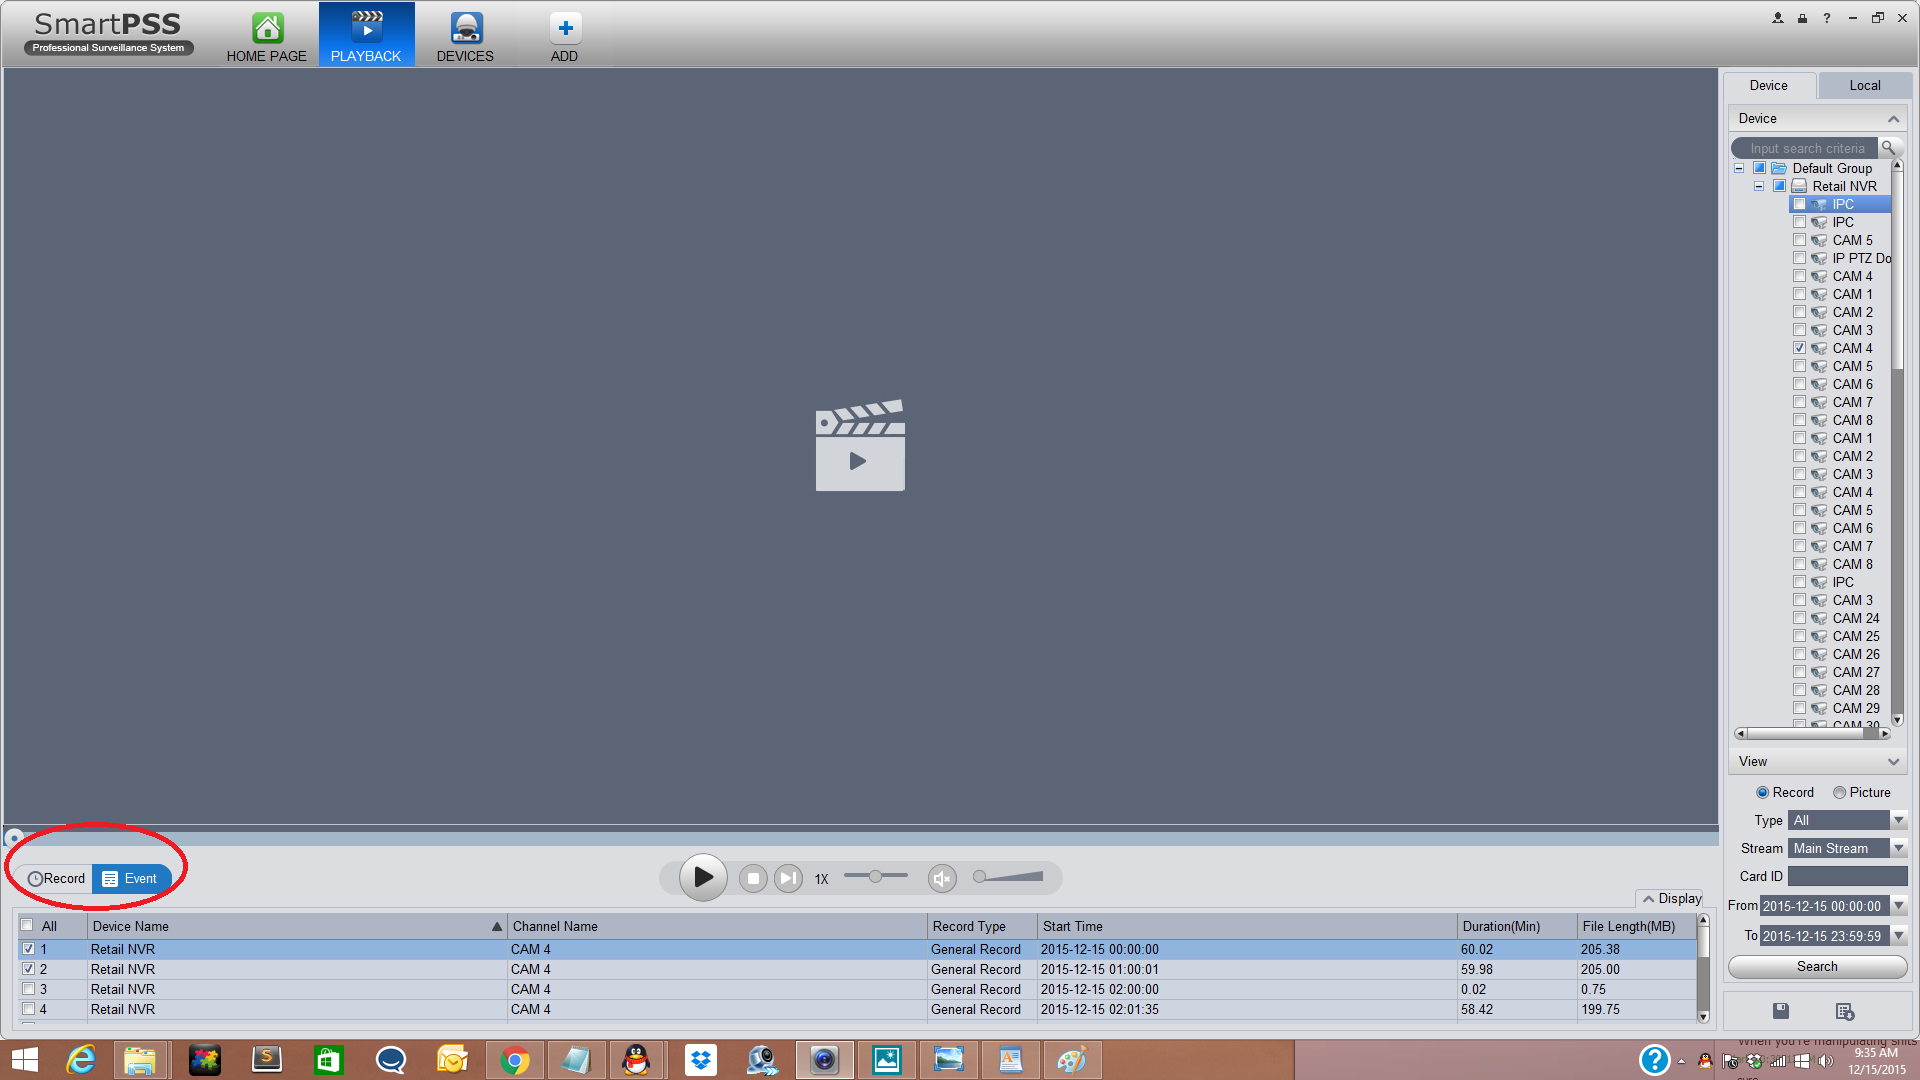
7. Select "Search".
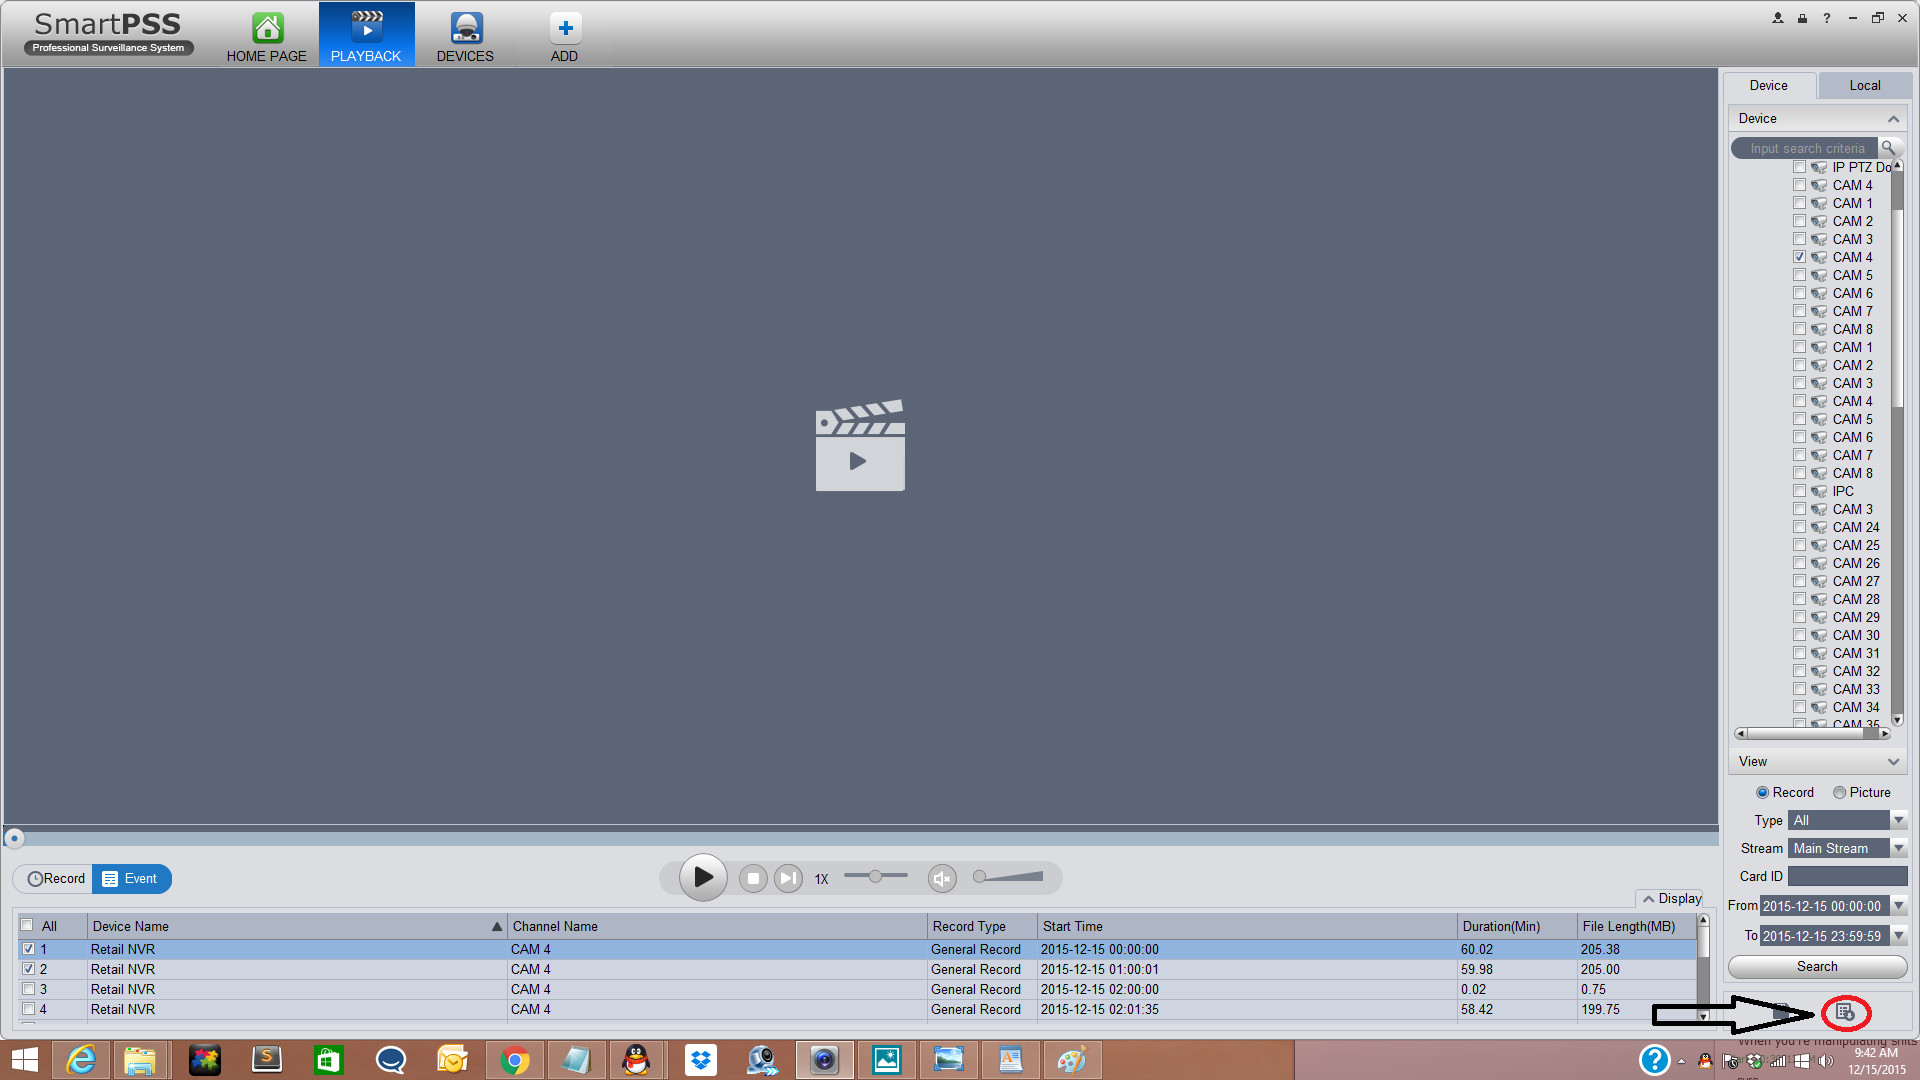
8. Select or Check which footage you need to export or download. Video footage can be viewed by clicking on the "Play" button and by selected events.

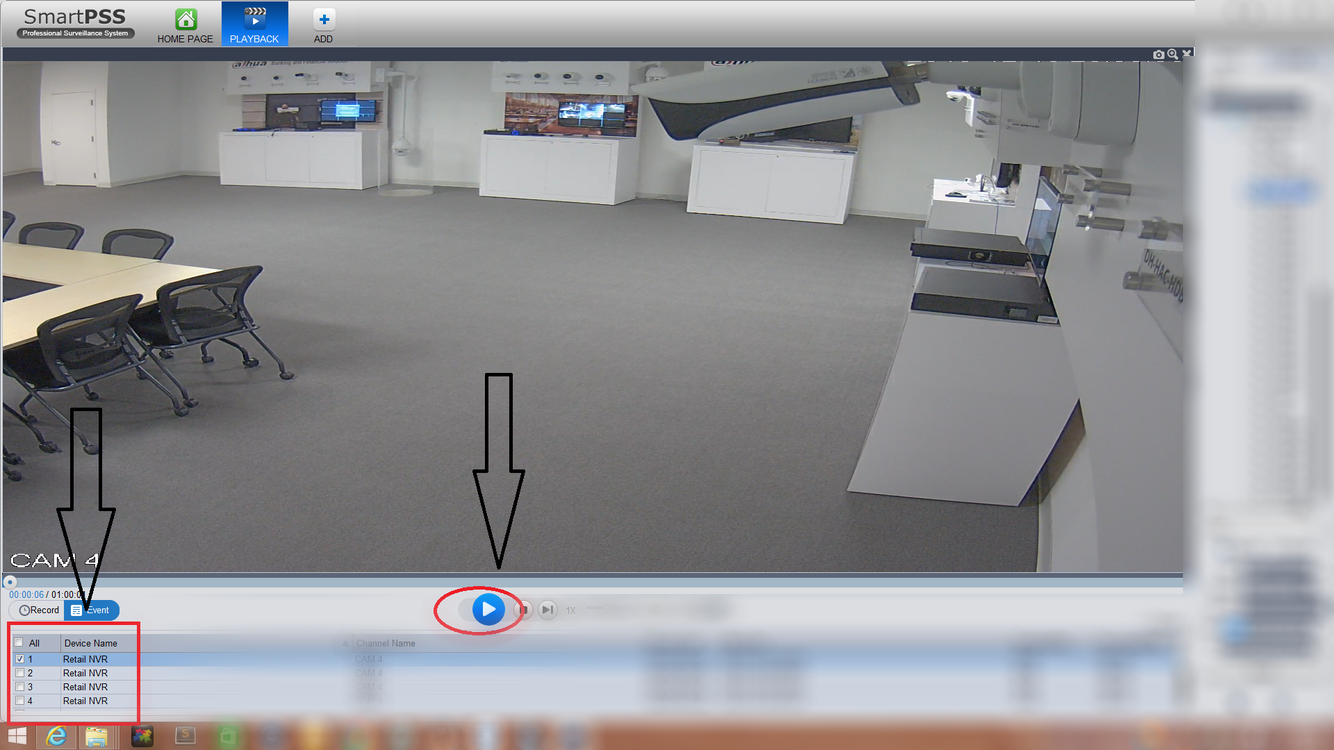
9. You may trim the video footage if the "Record tab" is selected. You will need to click the scissor or trim icon to trim the selected video.

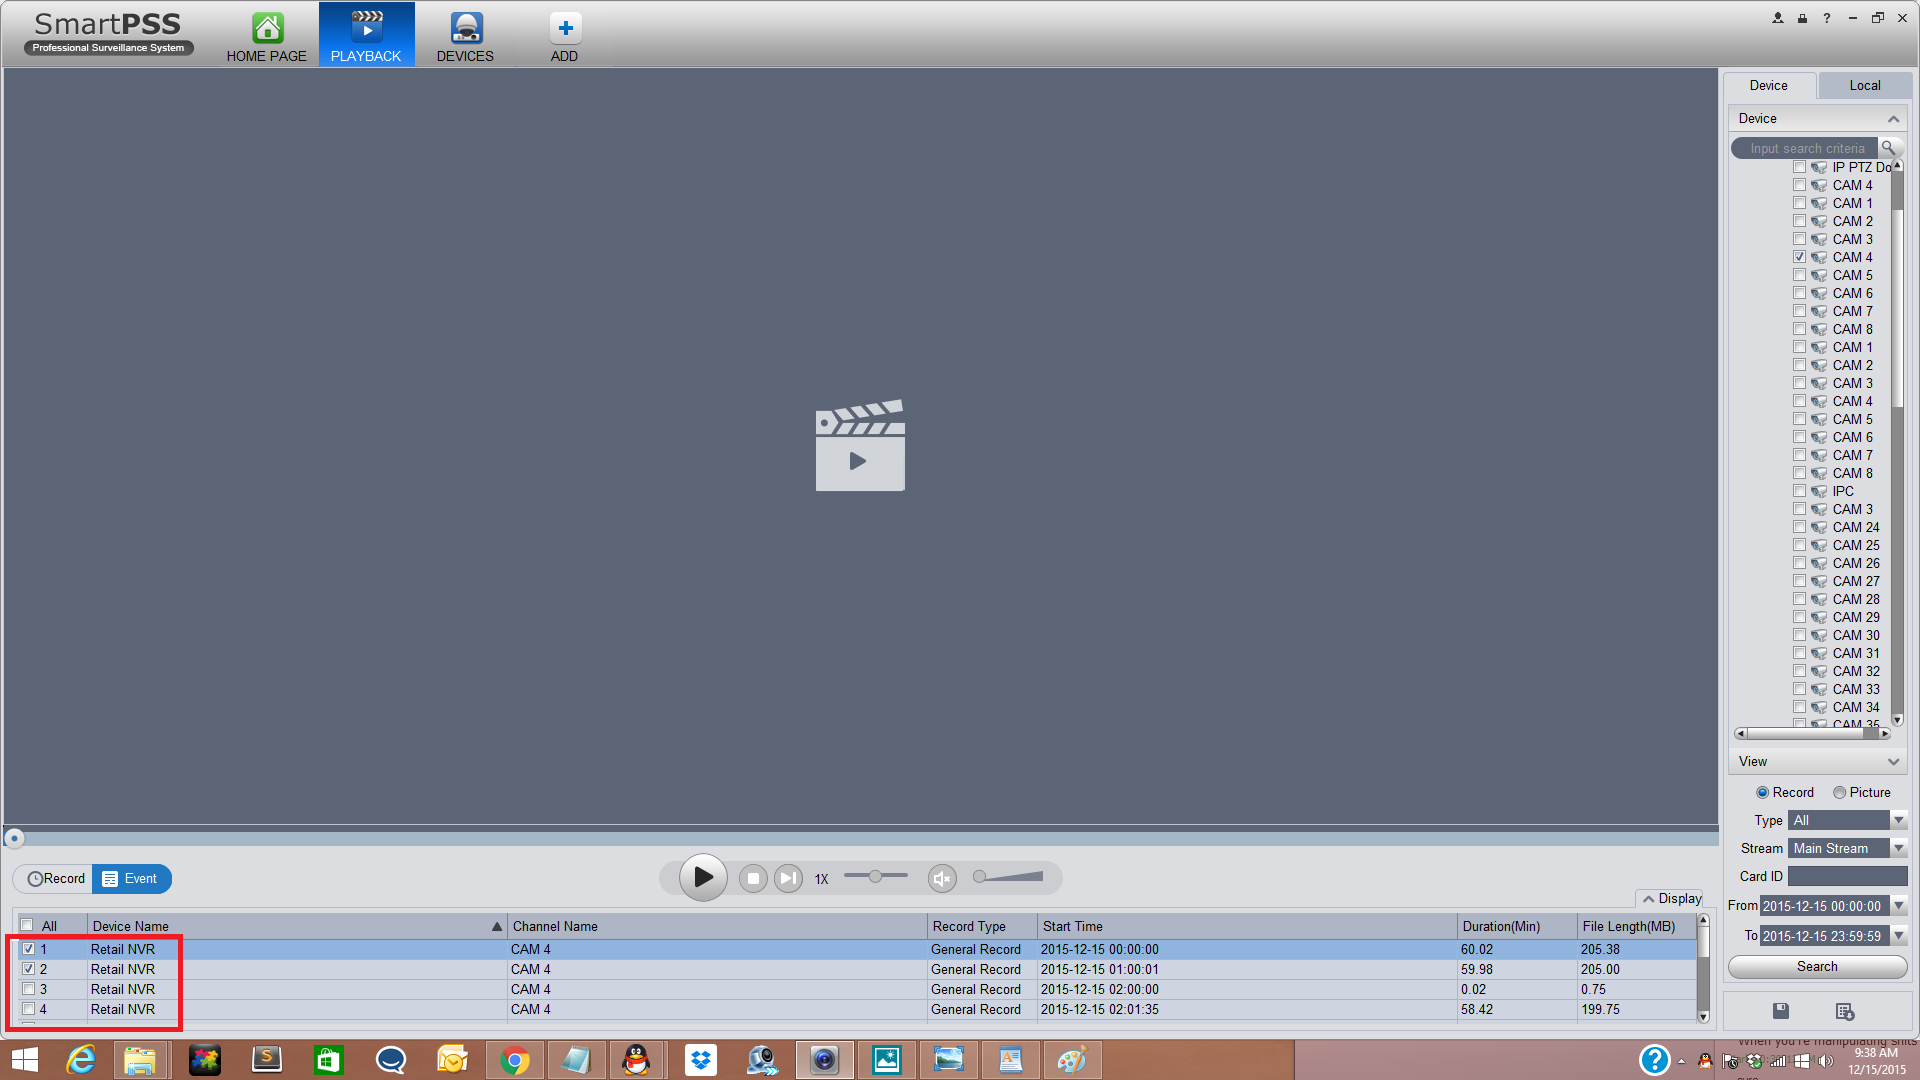
10. On the "Event" tab you will need to select or check the events you want to save e.g (1, 2, 3, 4). Multiple videos may be selected to export.
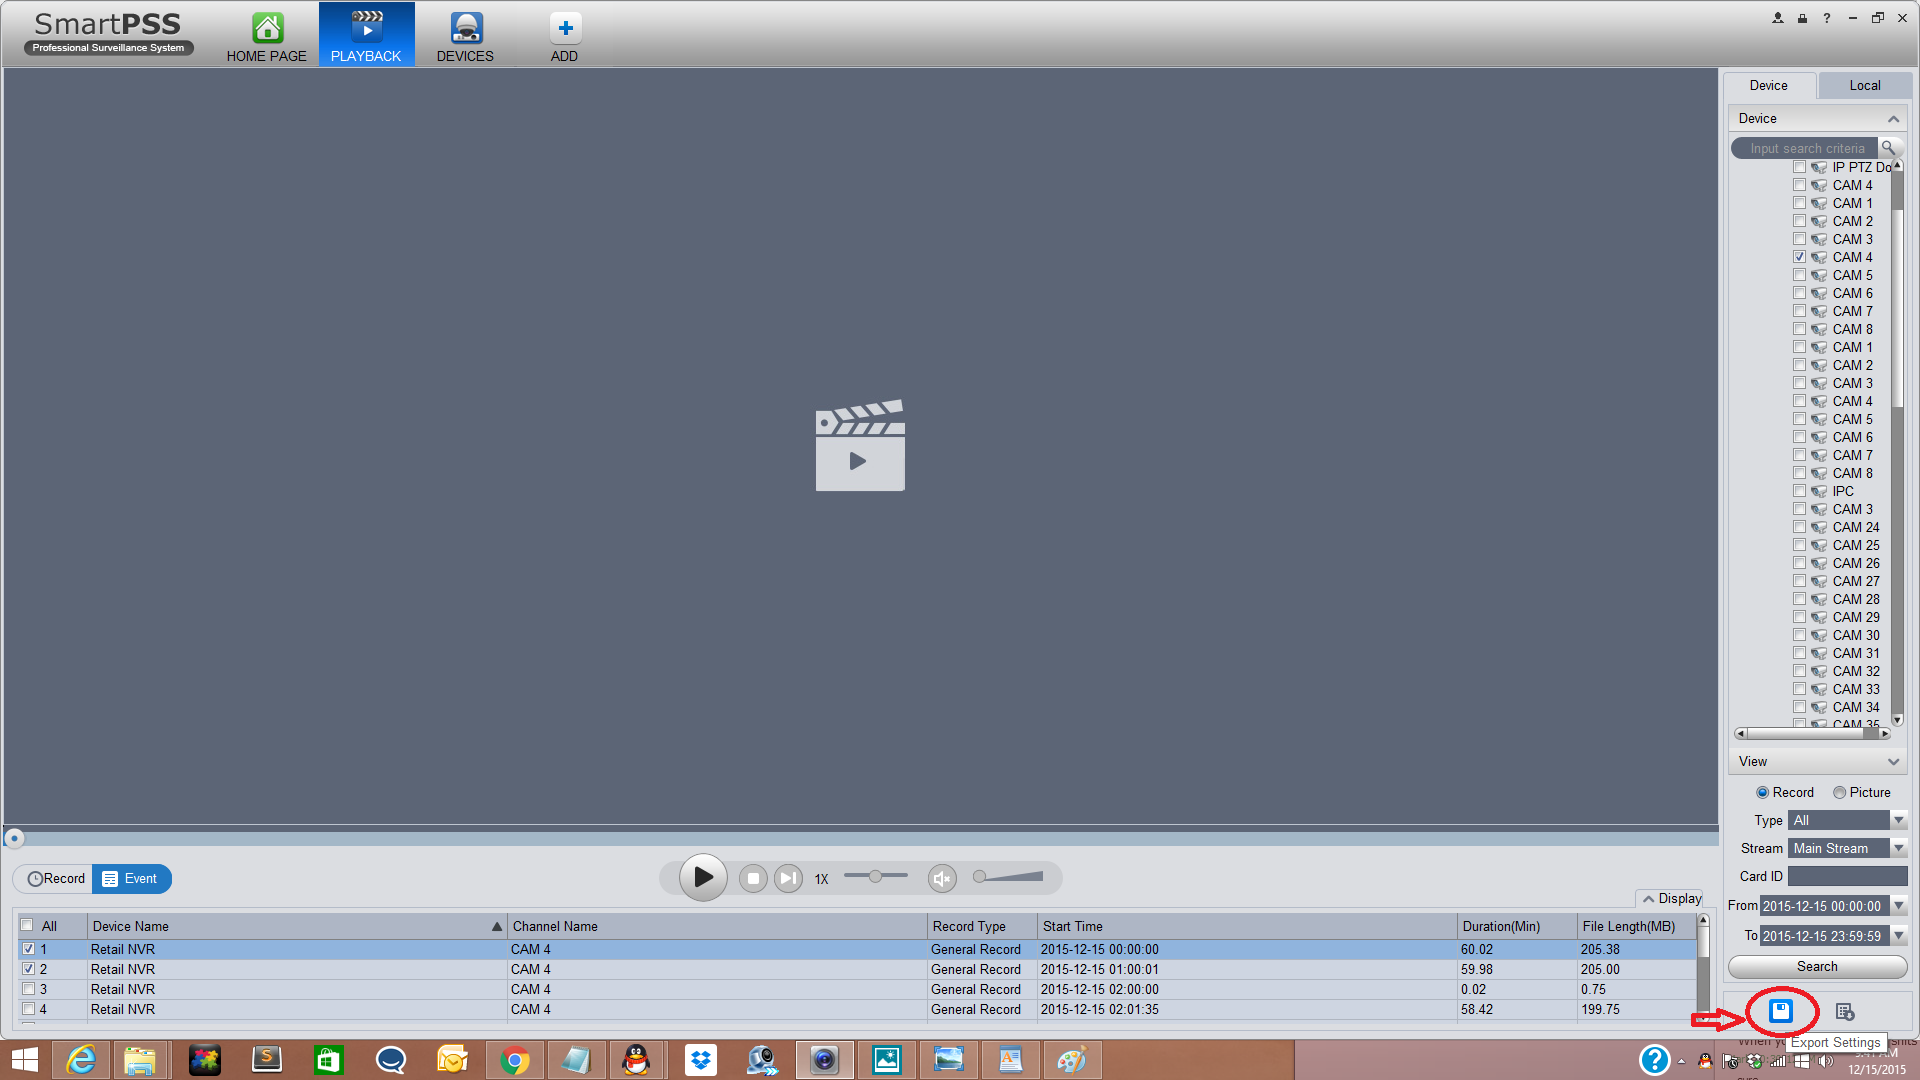
11. Click on the disk icon to save and start the export.
12. Select "Path" You would like to save to . You can save it to a specific folder.
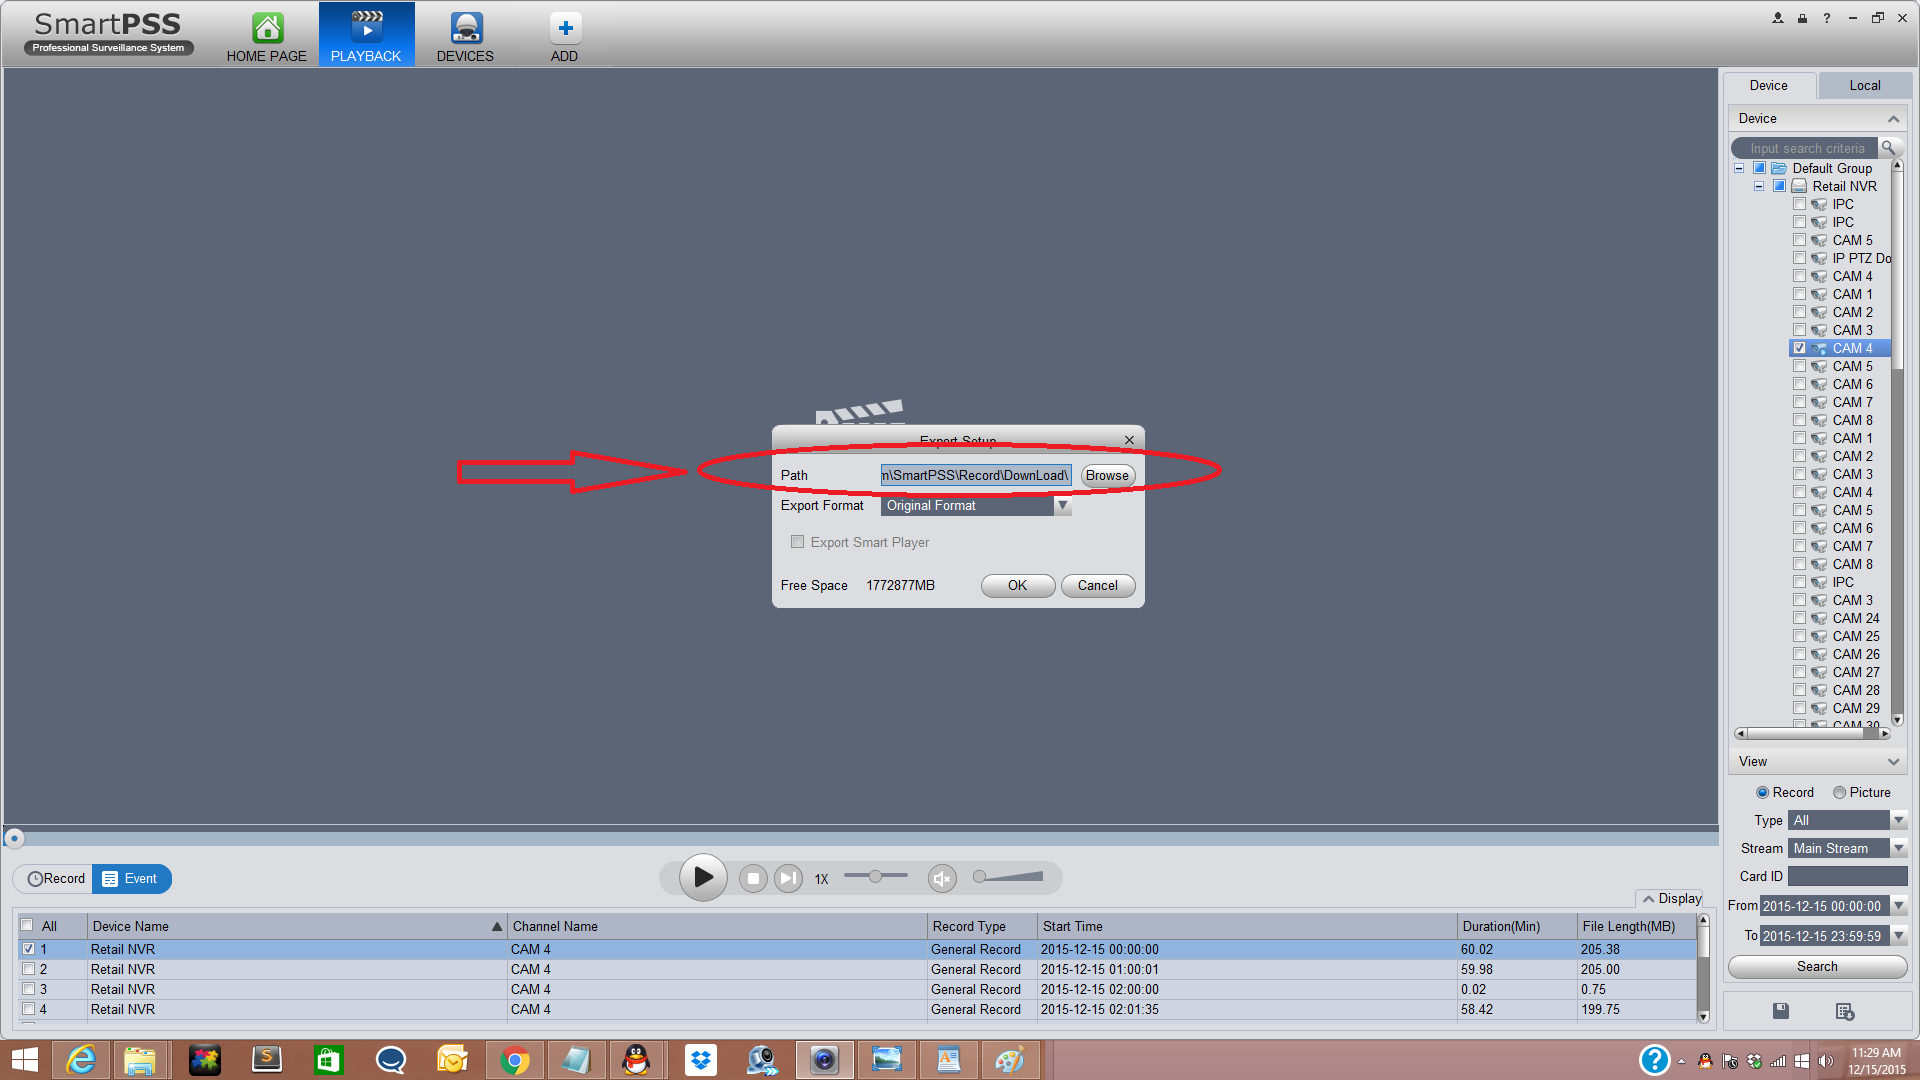
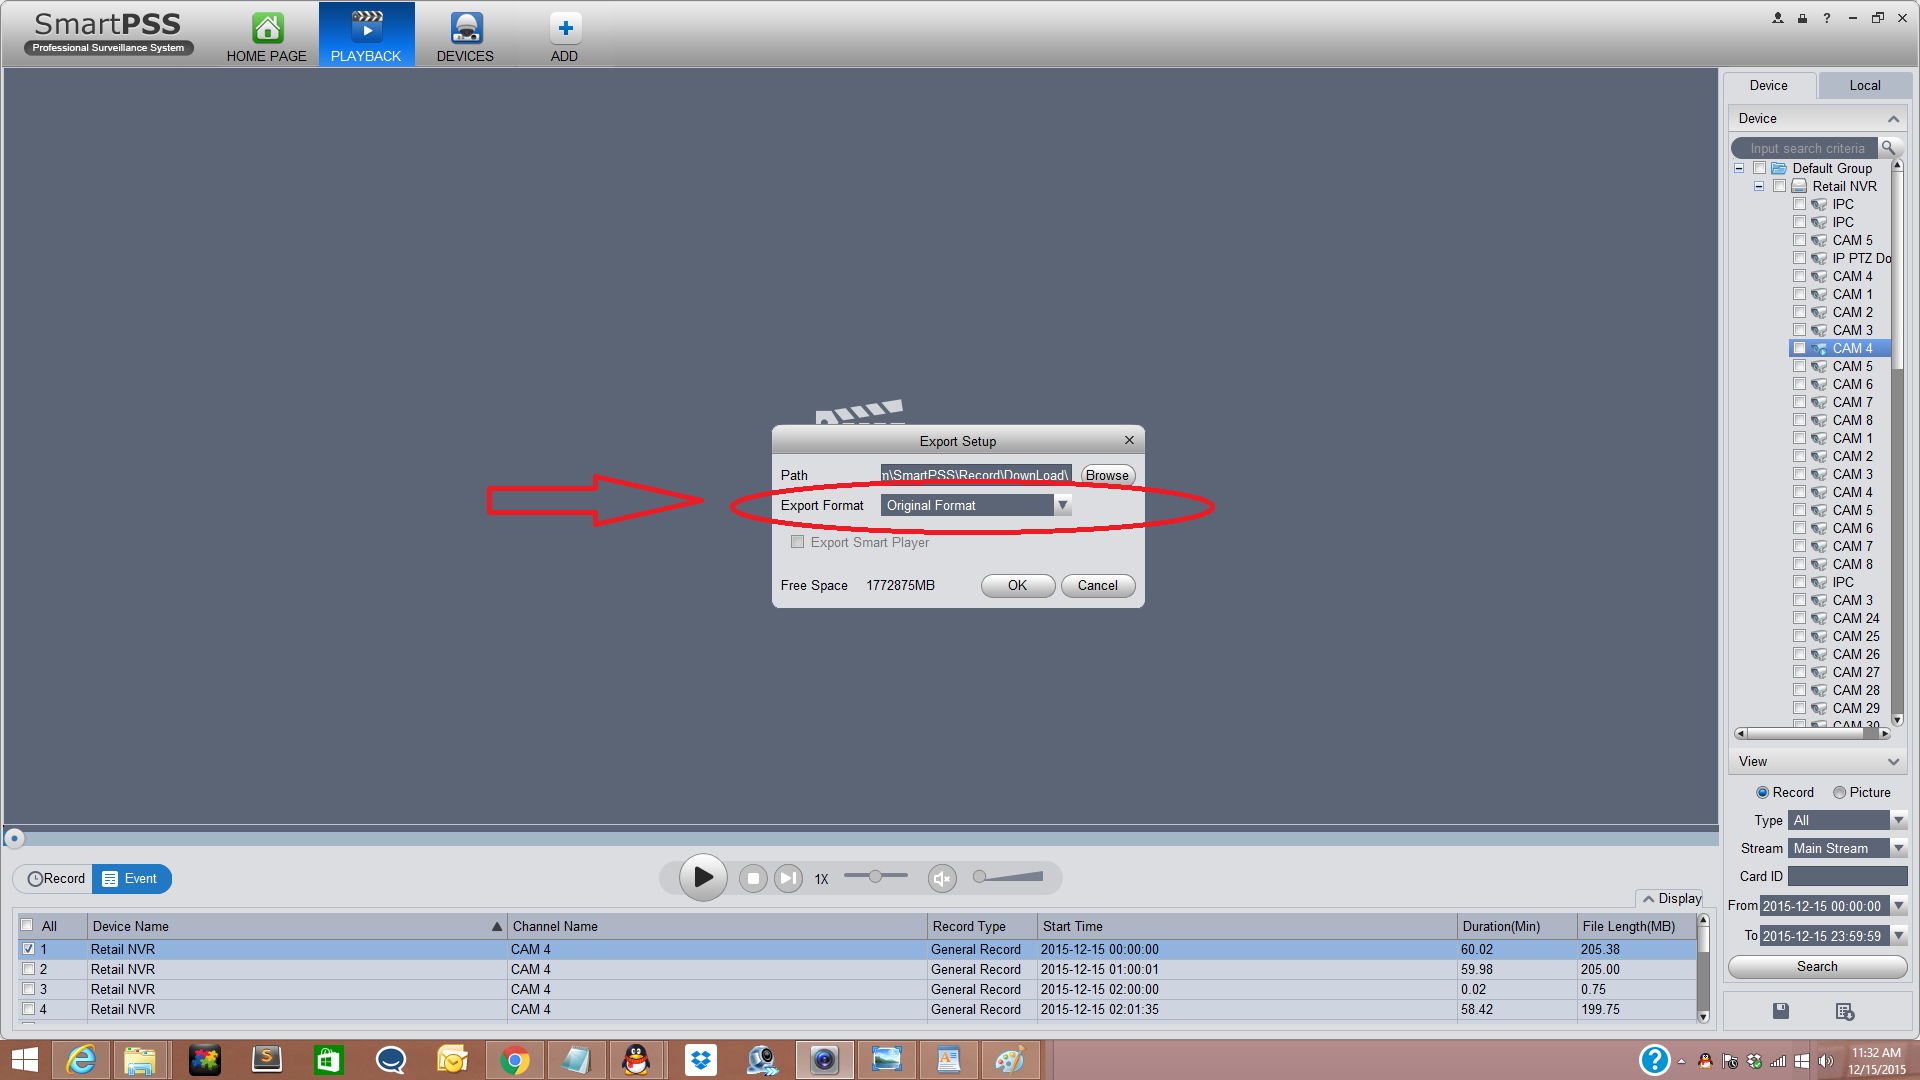
13. Select "Export Format" (Original Format, ASF, AVI, MP4) and click "OK"
14. The progress can be viewed clicking on the "Export Progress" icon.